When one of the glass globes on our kitchen pendant lights shattered, what started as a minor mishap turned into an unexpected opportunity to upgrade our space. Rather than simply replacing the broken piece, we decided to embrace the chance of installing a rustic kitchen light fixture that would add more character and warmth to our kitchen. If you’ve ever found yourself in a similar situation, whether from an accidental break or just a desire for a fresh look, replacing a light fixture is more manageable than you might think. In this post, I’ll walk you through how we designed and installed our new rustic light fixture, transforming a small kitchen disaster into a design improvement we absolutely love.
The Happy Accident
One day, while cleaning the glass globes of our kitchen lights, I didn’t quite tighten the screws enough on one of them. I let go of the glass, and a second later it fell. It landed on the kitchen island and didn’t break! What a relief! But then is started rolling, and fell off the edge of the island, hit the floor, and shattered everywhere. The entire event seemed like slow motion. And the rollercoaster of emotions in those few seconds was crazy… It fell… It was OK!… It fell again and was gone! The lights we picked as a part of our kitchen renovation were ruined.
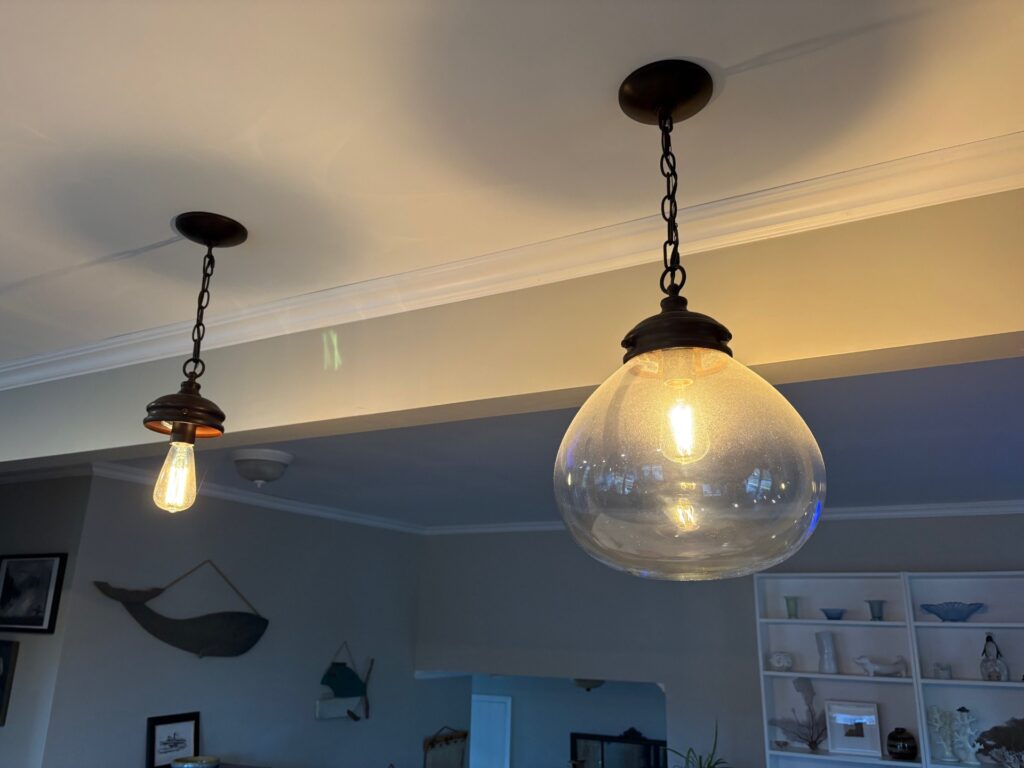
We searched everywhere for a replacement globe but could not find the same one anywhere. And since there were two fixtures, if we replaced one, we had to replace both. Any we found that we liked were over $1000. We needed to find another option.
The Inspiration
My wife and I have tried to keep our small house bright and cottagey feeling. We have a wide arrange of interesting items in our home that we have collected on our travels. At first, we weren’t thinking of that style for the kitchen fixture, but while shopping for a Mother’s Day gift, my wife and I were in a nice home decor store. We always like the merchandise in the store, but hadn’t been there in a while. In one of the rooms they had two light fixtures that we thought would be perfect for our kitchen. The main part of the fixture was a piece of driftwood, and the lights were 5 simple bulbs at the end of thick wire, that was wrapped around the driftwood. The search was on to try to recreate this in our home.
The Light Fixtures
The lights in the store were a single ceiling fixture with 5 bulbs. Our kitchen has 2 ceiling fixtures, and the island is almost 8 feet long, so we knew we could go a little bigger. I looked at the usual home renovation stores but I could not find what I was looking for. I finally checked Amazon and found what I was looking for. A great price, even for 2. The first step was complete.
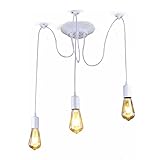
- DIY PENDANT ROPE :This spider pendant chandelier cable is adjustable in length, each one provides 200cm cable, easy to match with various decorative styles such as modern style or nostalgic style. Can be placed in any corner of your home according to your needs.
- EASY TO INSTALL AND SAFE :Spider fixture includes mounting accessories, just a simple light body assembly, easy to install, suitable for any E26 bulb. Voltage: 110V-240V.
- 100% SAFETY OPTION: Wire cable wrapped in white or black high quality insulation compound for greater safety and aesthetics. The safety performance is full while not losing the aesthetics.
- NOSTALGIC EXQUISITE DESIGN: Spider light adopts nostalgic industrial design style. Home dining room, kitchen, corridor, pub, high class bar, warehouse, bedroom, dining room, best for home decoration.
- ABOUT AFTER-SALES:Your satisfaction is our lifelong pursuit. We offer 30 days return and one year parts warranty, if any parts are missing or broken after receiving the parcel, please feel free to contact us, we will replace the new parts for you for free. Please don't hesitate to buy ^_^, you will never regret ordering this classic spider chandelier.
The Driftwood
This proved to be a little more difficult to find. We have plenty of trees in our yard, with plenty of fallen branches, but they didn’t look right. They weren’t old and weathered enough. We went to our cousin’s cottage for a few days. We paddled around the lake on kayak’s looking for driftwood. We found lots of old, weathered deck boards that were cool, and a few nice branches, but when we got them home, they weren’t big enough. We put the word out to our family that we were looking for the perfect piece of driftwood. One day we got a text from New Brunswick that our nephew had found the perfect piece for us. The only issue was we had to wait until the end of the summer for my wife’s parents to bring it to us. It arrived at the end of August and it was perfect!
The Preparation
We wanted the driftwood to look as naturally rustic as possible. All we did to prepare the piece was to leave it in the summer sun for a few weeks to ensure it was completely dry (I put it under the gazebo if there was a chance of rain). Once it was dry I simply gave it a good sanding with the palm sander to remove any dark spots and give it a nice smooth finish.

- Orbital sander with brushless motor provides runtime and efficiency to get the job done
- Variable-speed control of the hand sander from 8,000 to 12,000 opm to match the speed to the application
- Low-profile height of the power sander allows user to get close to work surface for precise sanding
- Replaceable 8-hole hook-and-loop sanding pad (dwe64233) for quick, easy paper changing
- Dust-sealed switch to protect against dust ingestion for long switch lifetexturized rubber overmold grip for comfortable sandingone-handed locking dust bagdust port is designed to fit directly to the dwv010 or dwv012 dust collectors (sold separately)to attach dust port to other vacuum systems with 1-1/4-inch hoses, use dwv9000 universal quick connector (sold separately)psa replacement pad available as service part number n373679 (sold separately)
Installation
Note: If you are not comfortable with electrical work, please hire an electrician for this part
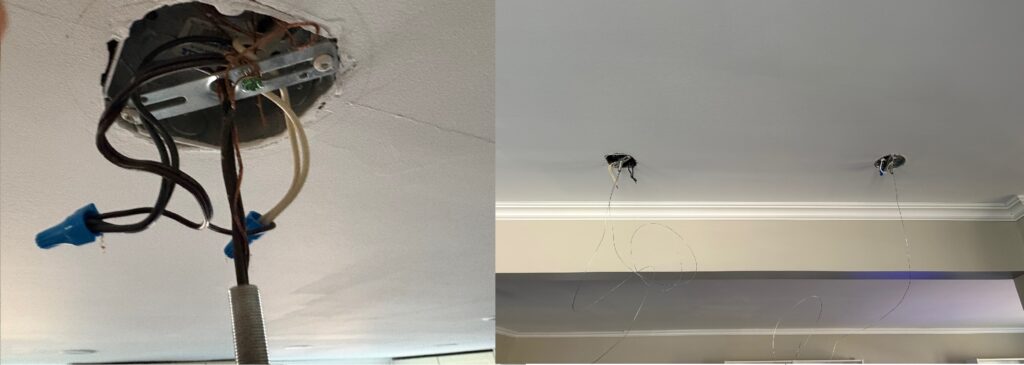
If you are replacing an existing light fixture, the installation is quite simple. First I turned off the breaker for the light. If your breakers aren’t well labeled, you can turn the light on, then turn off breakers until the light turns off. Then be sure to label the correct breaker. Use a voltage tester just to be sure there is no power going to the light fixture.
Next I removed the current fixtures. I removed the other glass ball and bulbs first to prevent any further accidents. Unscrew the base of the fixture at the ceiling and disconnect the wires. I always take a picture of the connections first so I have a reference for when I connect the new fixture.
Next I needed to prepare the wire I was using to hang the piece of driftwood. I used 18 gauge hanger wire for this. Use the appropriate size wire for the weight of the fixture you are hanging. In the ceiling itself, you must make sure you are connecting the hanger wire to something strong enough to support the weight. Your existing light fixture box should have been connected to a ceiling joist that can support the weight, but if not, you should connect the wire to one if possible. I basically cut a piece of wire twice as along as the distance from the ceiling to the counter and connected the mid point to the ceiling so I would have plenty of extra to work with when I connected the actual driftwood.
For the new fixtures, each light had its own wire, so I had to join them all together to make the connection to the wires in the ceiling simpler. To do this, I stripped the end of each wire and separated the black wires and white wires. I then joined all of the white wires together and the black wires together. Now I only had one wire of each to connect at the ceiling.
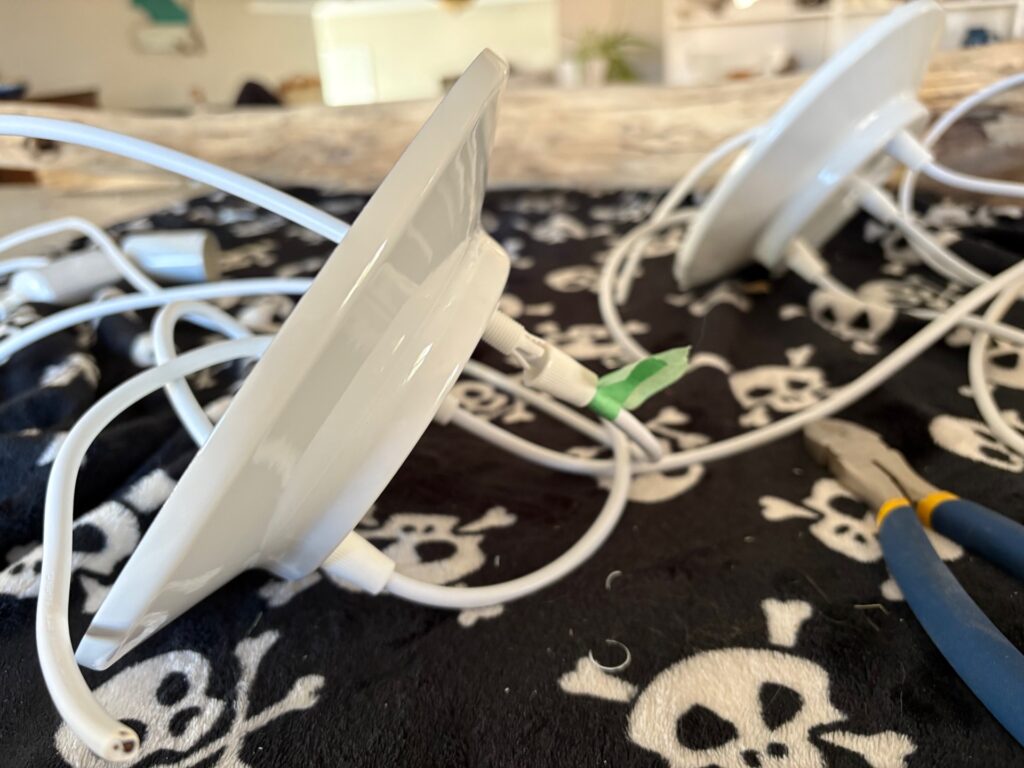
Once the support wire for the driftwood was done, it was time to install the fixtures. The fixtures I bought had a hole in the center that is used to connect it to the ceiling using a threaded tube and a washer. Make sure you pass the support wires for the driftwood through this tube before you install it.
Now it is time to connect the fixture wires to the wiring for the lights. Connect the combined white wires to the white, the combined black wires to the black (or whatever colors they are, just make sure they are connected the same as your picture you took). There may be a ground wire to connect to the box in the ceiling as well. Use the wire connectors provided to secure the connections. Just connect the wire, twist them together, and then put the wires into the connector and turn clockwise.
Once the fixtures are connected, it is a good idea to test them to make sure everything is wired correctly. Make sure the switch is turned off, then turn the breaker back on. Turn the switch on and make sure the fixture lights up. If the lights don’t work, you will have to double check the connections and test again. If all is good, turn the breaker back off and continue with the installation.
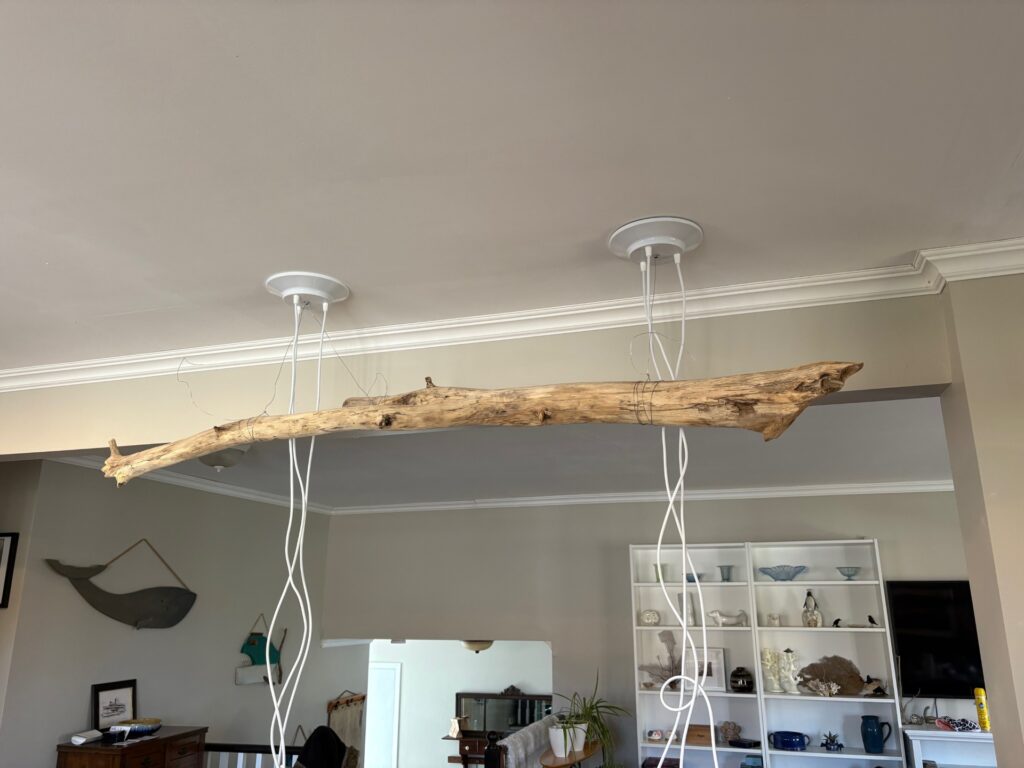
Now that the lights are connected and working, the rest of the work is cosmetic. It is time to hang the driftwood! Depending on the shape and size of your driftwood, you may need help for this part. Hold up the driftwood in the desired position and then wrap the hanging wire around it. It may take a few tries to get the driftwood level and at the desired height. Once you are happy with the position, wrap the wire around a few times to ensure it is secure and cut off the extra wire.
Now that the driftwood is in place, it is time to wrap the light cords around the driftwood. This is where I had trouble. The cords for the lights did not look the way we had envisioned. They looked too bulky. The solution was to shorted the amount of cord that was hanging from the ceiling. The only problem was I needed to take everything down and basically start over! I had to disconnect the wire connections, take the fixtures down and pull the cord through the base of the fixture in order to cut it shorter. I then repeated all of the steps to install everything again.
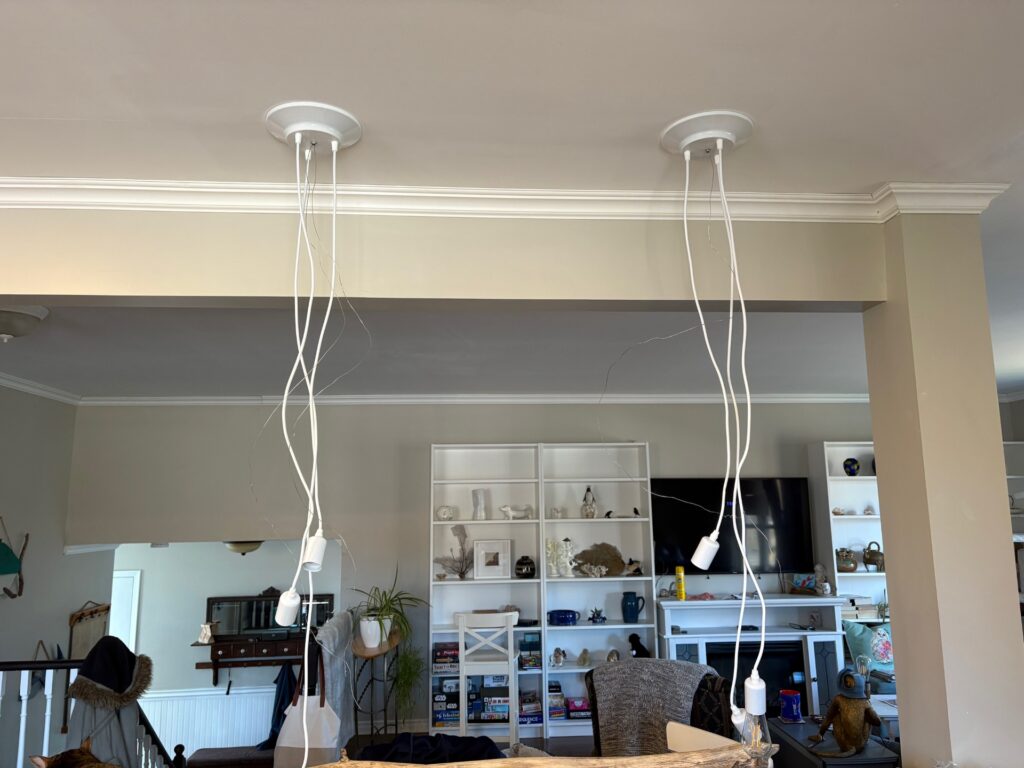
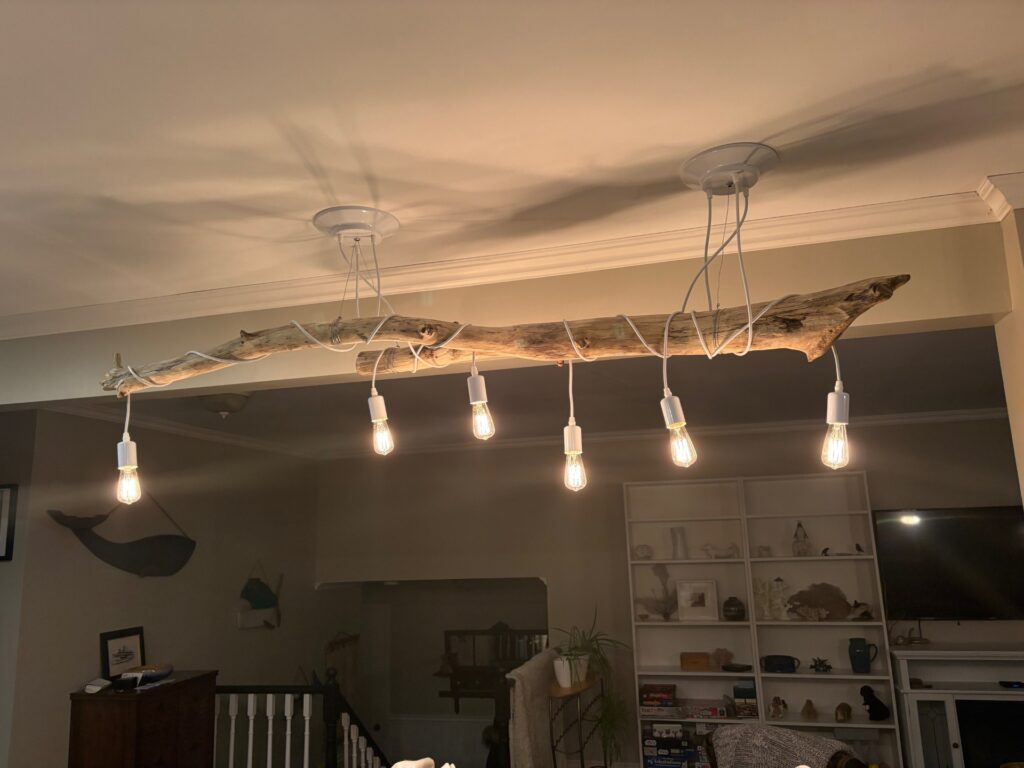
Once the cords were shortened, the fixture was perfect, exactly as we wanted!
Lessons Learned
I had installed light fixtures before, but this one was a little different. Having the multiple lights that needed to be joined together was something new, as well as suspending the driftwood from the ceiling. Having to completely uninstall the fixtures to shorten the cords was unfortunate, so as they say, measure twice and cut once. I had to combine function with aesthetics, which took some trial and error, but overall I am very happy with the final result. Installing a new light fixture can be a daunting task, but once you have done it, it won’t be as scary next time.