Key Takeaways
- Understand the essential materials needed for a DIY backsplash installation, including tiles, tile adhesive, grout, and necessary tools.
- Discover the step-by-step techniques for measuring, planning, and preparing the wall surface before tile installation.
- Learn how to properly cut and lay tiles, mix mortar, and grout the tile joints for a professional-looking finish.
- Gain insights on sealing and finishing the backsplash to ensure it stands the test of time.
- Explore the benefits of tackling this home improvement project yourself and the satisfaction of a job well done.
Measure and Plan the Backsplash Area
Getting the backsplash area measured right and planning the tile layout is crucial for a DIY success. Start by figuring out the square footage of the backsplash by measuring its width and height. This step helps you know how many tiles, mortar, and grout you’ll need.Calculating Square Footage and Material Quantities
To find the square footage, just multiply the width and height of the backsplash area. For instance, if it’s 8 feet wide and 2 feet tall, the total square footage is 16 square feet (8 ft x 2 ft = 16 sq ft). After getting your measurements, use a tile calculator to figure out how many tiles you’ll need. Remember to include extra for waste or pattern matching. Also, plan for the right amount of thin-set mortar and grout for the job.Considering Wall Obstructions and Electrical Outlets
Keep in mind any wall obstructions like electrical outlets, switches, or fixtures when measuring the backsplash. These will change the tile layout and might need special cuts or planning. Make sure to measure the space around them for a smooth, professional look. By carefully measuring and planning for any obstacles, you’re set for a great DIY tile project.“Careful planning and precise measurements are the foundations of a successful DIY backsplash installation.”
Prepare the Wall Surface
Before installing a new backsplash, make sure the wall is ready. This ensures a smooth and strong base for your new tile. We’ll go over how to remove old tile or backsplash and clean and fix the wall.Removing Old Tile or Backsplash
First, remove any old tile or backsplash on the wall. Use a masonry hammer and chisel to break and pry off the tiles. Be slow and careful to not harm the wall underneath. After removing the tiles, use a scraper or putty knife to get rid of any leftover adhesive or grout.Cleaning and Repairing the Wall
Now, clean and repair the wall after removing the old backsplash. Clean it with a TSP solution to remove dirt, grease, or debris. This makes sure the new tile sticks well. Check the wall for cracks, dents, or uneven spots. Fix these with joint compound, then sand it smooth. Finally, apply a primer to the wall for the best surface for the new tile. Preparing the wall well is key for a successful backsplash installation. With the old tile gone and the surface clean and fixed, your new backsplash will have a solid base to be installed on.
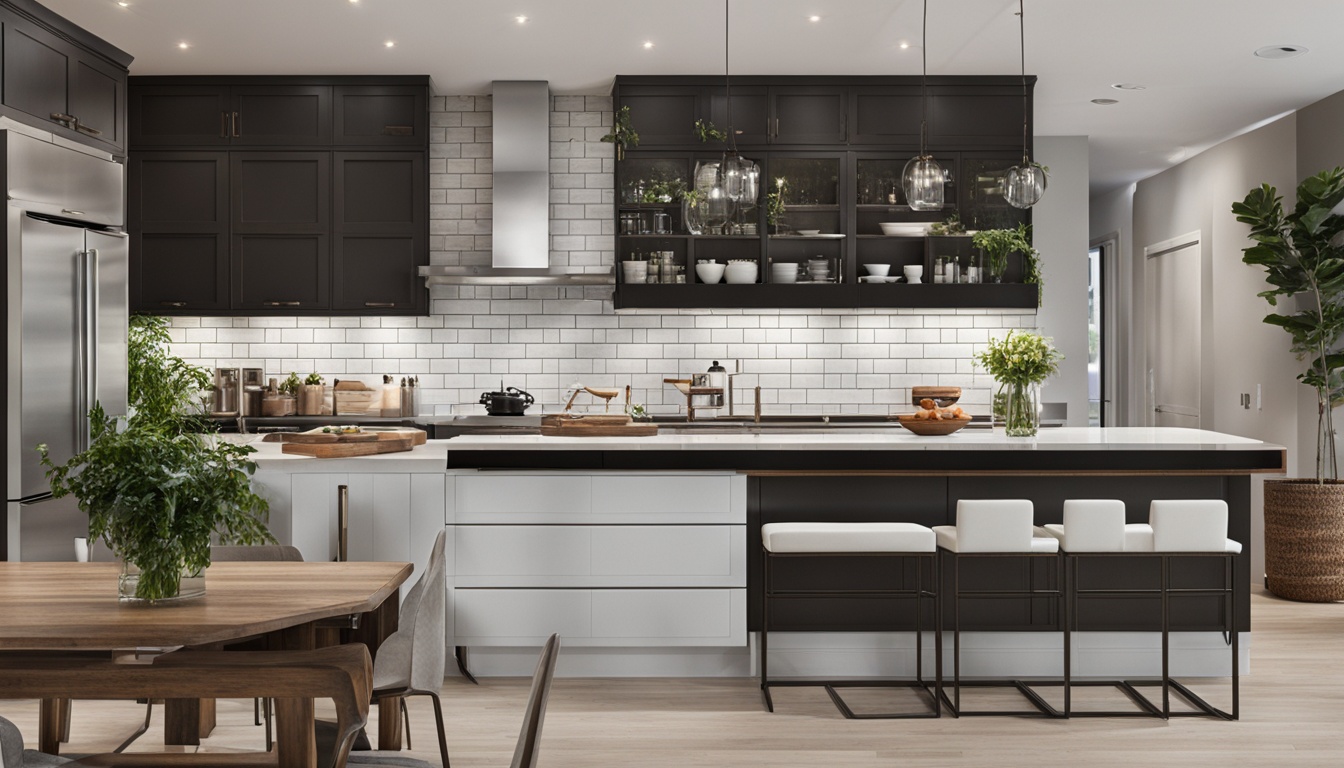
Select and Cut Tiles
Choosing the right backsplash tiles is a fun part of redoing your kitchen. The tiles you pick can change how your space looks and feels. Think about style, color, and material that matches your kitchen’s look. After picking the perfect backsplash tiles, you might need to cut them to fit your kitchen’s shape. A wet tile saw is the top choice for clean cuts. This is especially true for natural stone tiles, which can chip or crack easily with other tools.- Measure the area and plan the tile layout to see which tiles need cutting.
- Set up your wet tile saw as the maker says, making sure it’s stable and safe.
- Mark the tiles to be cut, thinking about outlets, edges, and corners.
- Wear safety glasses and gloves when using the wet tile saw.
- Slowly move the tiles through the saw blade, making adjustments for a good fit and finish.
“The right backsplash tiles can make all the difference in transforming your kitchen’s look and feel.”By picking and cutting tiles for your backsplash with care, you can make a design that’s all yours. With the right tools and steps, you’re on your way to a stunning, pro-looking backsplash.
Mix Thin-Set Mortar or Prepare Tile Adhesive
Getting your tile installation materials ready is key to a great backsplash. You can use thin-set mortar or a premixed tile adhesive. Making sure the mix is perfect is crucial for a good result.Mixing Thin-Set Mortar
For thin-set mortar, follow the maker’s instructions closely. Begin by putting dry mortar powder in a clean bucket. Then, add water slowly while mixing well. Let the mortar rest, or slake, as advised before remixing and applying it to the wall. It should be creamy and easy to spread, without lumps or dry areas.Using Premixed Tile Adhesive
Or, you can pick a premixed tile adhesive for a simpler process. These are ready to use, so just apply them to the wall with a trowel. Make sure the adhesive fits the tiles you’re using, as different tiles need different adhesives. Choosing to mix thin-set mortar or use a premixed adhesive makes a big difference. Taking time to prepare your materials ensures a strong, lasting, and good-looking backsplash.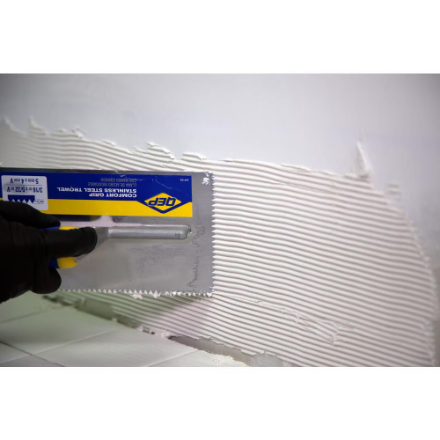
Pre-Lay the Tile Pattern
Before sticking the tiles to the wall for good, it’s smart to pre-lay the tile pattern. This lets you see how the tiles will look and adjust the tile layout if needed. By laying the tiles on the countertop or floor first, you can keep the grout lines even with spacers. This makes the backsplash look smooth and nice. After you like the tile pattern, mark the wall with a pencil. These marks will help you place the tiles correctly during installation. This makes sure your backsplash looks perfect and straight.“Proper planning and pre-laying the tile pattern is the key to a successful DIY backsplash project. It allows you to catch any design flaws or layout issues before you start permanently adhering the tiles to the wall.”Remember, spending time to pre-lay the tiles and plan is key. It helps you avoid problems later. By seeing the final look and making changes, you’re on your way to a great DIY backsplash.
Install Backer Board (Optional)
Installing a backer board before tiling is a smart move for a durable and moisture-resistant backsplash. This material acts as a strong base, stopping tiles from warping or cracking. Here’s how to install and seal the backer board correctly.Attaching Backer Board to Wall Studs
Start by measuring the wall for your backsplash. Cut the backer board to fit perfectly, making sure it fits well. Use special screws to attach the backer board to the wall studs. Place screws about 8 inches apart for a strong hold.Sealing Seams and Corners
After putting the backer board up, seal the seams and corners to keep out water. Use silicone caulk along the joints, then smooth it with a putty knife. Next, put on fiberglass mesh tape over the seams, pressing it into the caulk. This makes a waterproof seal and strengthens the installation. By installing backer board, attaching it to wall studs, and sealing the seams, you’re setting up a backsplash that lasts. This step might take a bit longer, but it’s worth it for a DIY project that lasts.Apply Mortar or Tile Adhesive
Getting the right technique for applying tile mortar or adhesive is key for your backsplash tile job. First, make sure your wall is ready and any backer board is in place. Then, you can spread the tile adhesive on the surface. Start by working on small sections. Use a notched trowel to put an even layer of tile mortar on the wall. Make parallel ridges to help the tiles stick well and make a strong backsplash. For tile adhesive that comes mixed, just spread it on the wall with the trowel for a smooth surface. Be careful and make sure you cover the whole area before moving on. This makes laying the tiles easier later. With the mortar or adhesive ready, you’re getting closer to a beautiful backsplash tile installation.“The key to a flawless backsplash is all in the preparation – and that includes getting the mortar or adhesive just right.”
DIY backsplash installation
Now, it’s time to start installing your tile backsplash with the mortar or adhesive ready. Begin in the center or the most visible part of the wall. Press each tile firmly into the adhesive, keeping grout lines even with tile spacers. Make sure to rock the tiles back and forth to secure them to the wall. Move outward from the center, paying attention to how each tile fits. Adjust them before the adhesive dries. This step is key for a professional look in your diy backsplash installation. Take your time and check the overall look as you work.“The key to a flawless tile backsplash is in the careful placement of each individual tile. With a little patience and attention to detail, you can create a stunning, seamless finish.”The way you place the tiles is as crucial as preparing and applying the adhesive. By being precise and taking your time, you’re on your way to a beautiful, useful diy backsplash installation. It will impress your friends and neighbors.
Grout the Tile Joints
After 24 hours, it’s time to grout the tile joints. This step secures the tiles and gives your backsplash a professional look. It’s a key part of your DIY project.Mixing and Applying Grout
Start by mixing the grout as the instructions say. Let it rest, or “slake,” before remixing and applying it. Use a rubber grout float to press it into the joints diagonally.Cleaning Excess Grout
Once the grout has set a bit, use a damp sponge to clean off the tile surface. Rinse the sponge often to avoid smudging the grout tile backsplash. This ensures a clean finish. For a great grout tile backsplash, mix and clean the grout well. Take your time and follow the instructions for the best look.“Grouting is the icing on the cake for your DIY backsplash project. Get it right, and your kitchen will shine!”
Seal and Finish the Backsplash
Now that the tiles and grout are set, it’s time to seal and finish your DIY backsplash. This step protects your hard work and keeps your backsplash looking great for years.Applying Grout Sealer
Apply a high-quality grout sealer after the grout cures, usually 72 hours later. Follow the instructions for application and drying. This step is key for your seal backsplash‘s long-term look and durability.Caulking Expansion Gaps
Use color-matched caulk for the gaps between the tile and the countertop or cabinets. This lets the backsplash move with temperature and humidity changes, preventing grout cracks. Proper caulking expansion gaps gives your backsplash a sleek, professional finish. Sealing and finishing your DIY backsplash takes time but rewards you with a durable, beautiful finished backsplash. These steps ensure your effort lasts.Conclusion
Now, I know how to do a DIY backsplash installation in my kitchen. This home improvement project will make my kitchen look better and increase its value. I’ll take my time, work safely, and enjoy making a stunning new backsplash. The DIY backsplash installation might seem hard at first. But with the right materials, tools, and techniques, it’s rewarding and saves money. These instructions will help me update my kitchen’s look, whether I’m refreshing or creating a new backsplash. I’m excited to use my new skills to make a backsplash that looks great and improves my kitchen’s look and function. Taking on this home improvement project will give me a sense of accomplishment and pride in my updated kitchen.FAQ
What materials and tools do I need for a DIY backsplash installation?
You’ll need tiles, tile adhesive or thin-set mortar, and a wet tile saw. Also, get tile spacers, a notched trowel, a grout float, and basic tools like a measuring tape and level. Don’t forget a sponge.
How do I accurately measure the backsplash area and determine the tile quantity?
Measure the backsplash area’s width and height, considering any wall obstructions. Then, use a tile calculator to figure out how many tiles, mortar, and grout you’ll need.
How do I prepare the wall for tile installation?
Start by removing any old backsplash. Clean the wall with a TSP solution. Fix any cracks or uneven spots, and prime the surface for better tile adhesion.
What factors should I consider when selecting the right tiles for my backsplash?
Think about the style, color, and material of the tiles. They should match your kitchen’s look. You might need a wet tile saw to cut tiles for fitting around edges or obstacles.
How do I properly prepare and apply the tile adhesive or mortar?
Mix the thin-set mortar or use a premixed tile adhesive as the instructions suggest. Let the mortar rest before applying it to the wall with a notched trowel.
Why should I pre-lay the tile pattern before installation?
Pre-laying the tiles lets you see the final design and adjust it if needed. This avoids mistakes in the final installation.
When and how should I install a backer board for my backsplash?
Put in a backer board for a strong, moisture-resistant surface. Measure, cut, and attach it to the wall studs. Seal the seams and corners with silicone caulk and fiberglass mesh tape.
What’s the proper technique for applying the tile adhesive or mortar and installing the tiles?
Spread the adhesive or mortar evenly with a notched trowel. Press the tiles into place, using spacers for uniform grout lines.
How do I grout the tile joints, and when should I apply the grout sealer?
Mix the grout as the manufacturer directs, then fill the joints with it. Clean the excess with a damp sponge after it sets a bit. Apply grout sealer 72 hours later, once the grout is fully dry.
How do I finish and seal the backsplash installation?
Use caulk that matches the tile color to fill gaps between the tile and other surfaces. This lets the backsplash expand and contract safely. Finally, seal the tile and grout with a grout sealer.