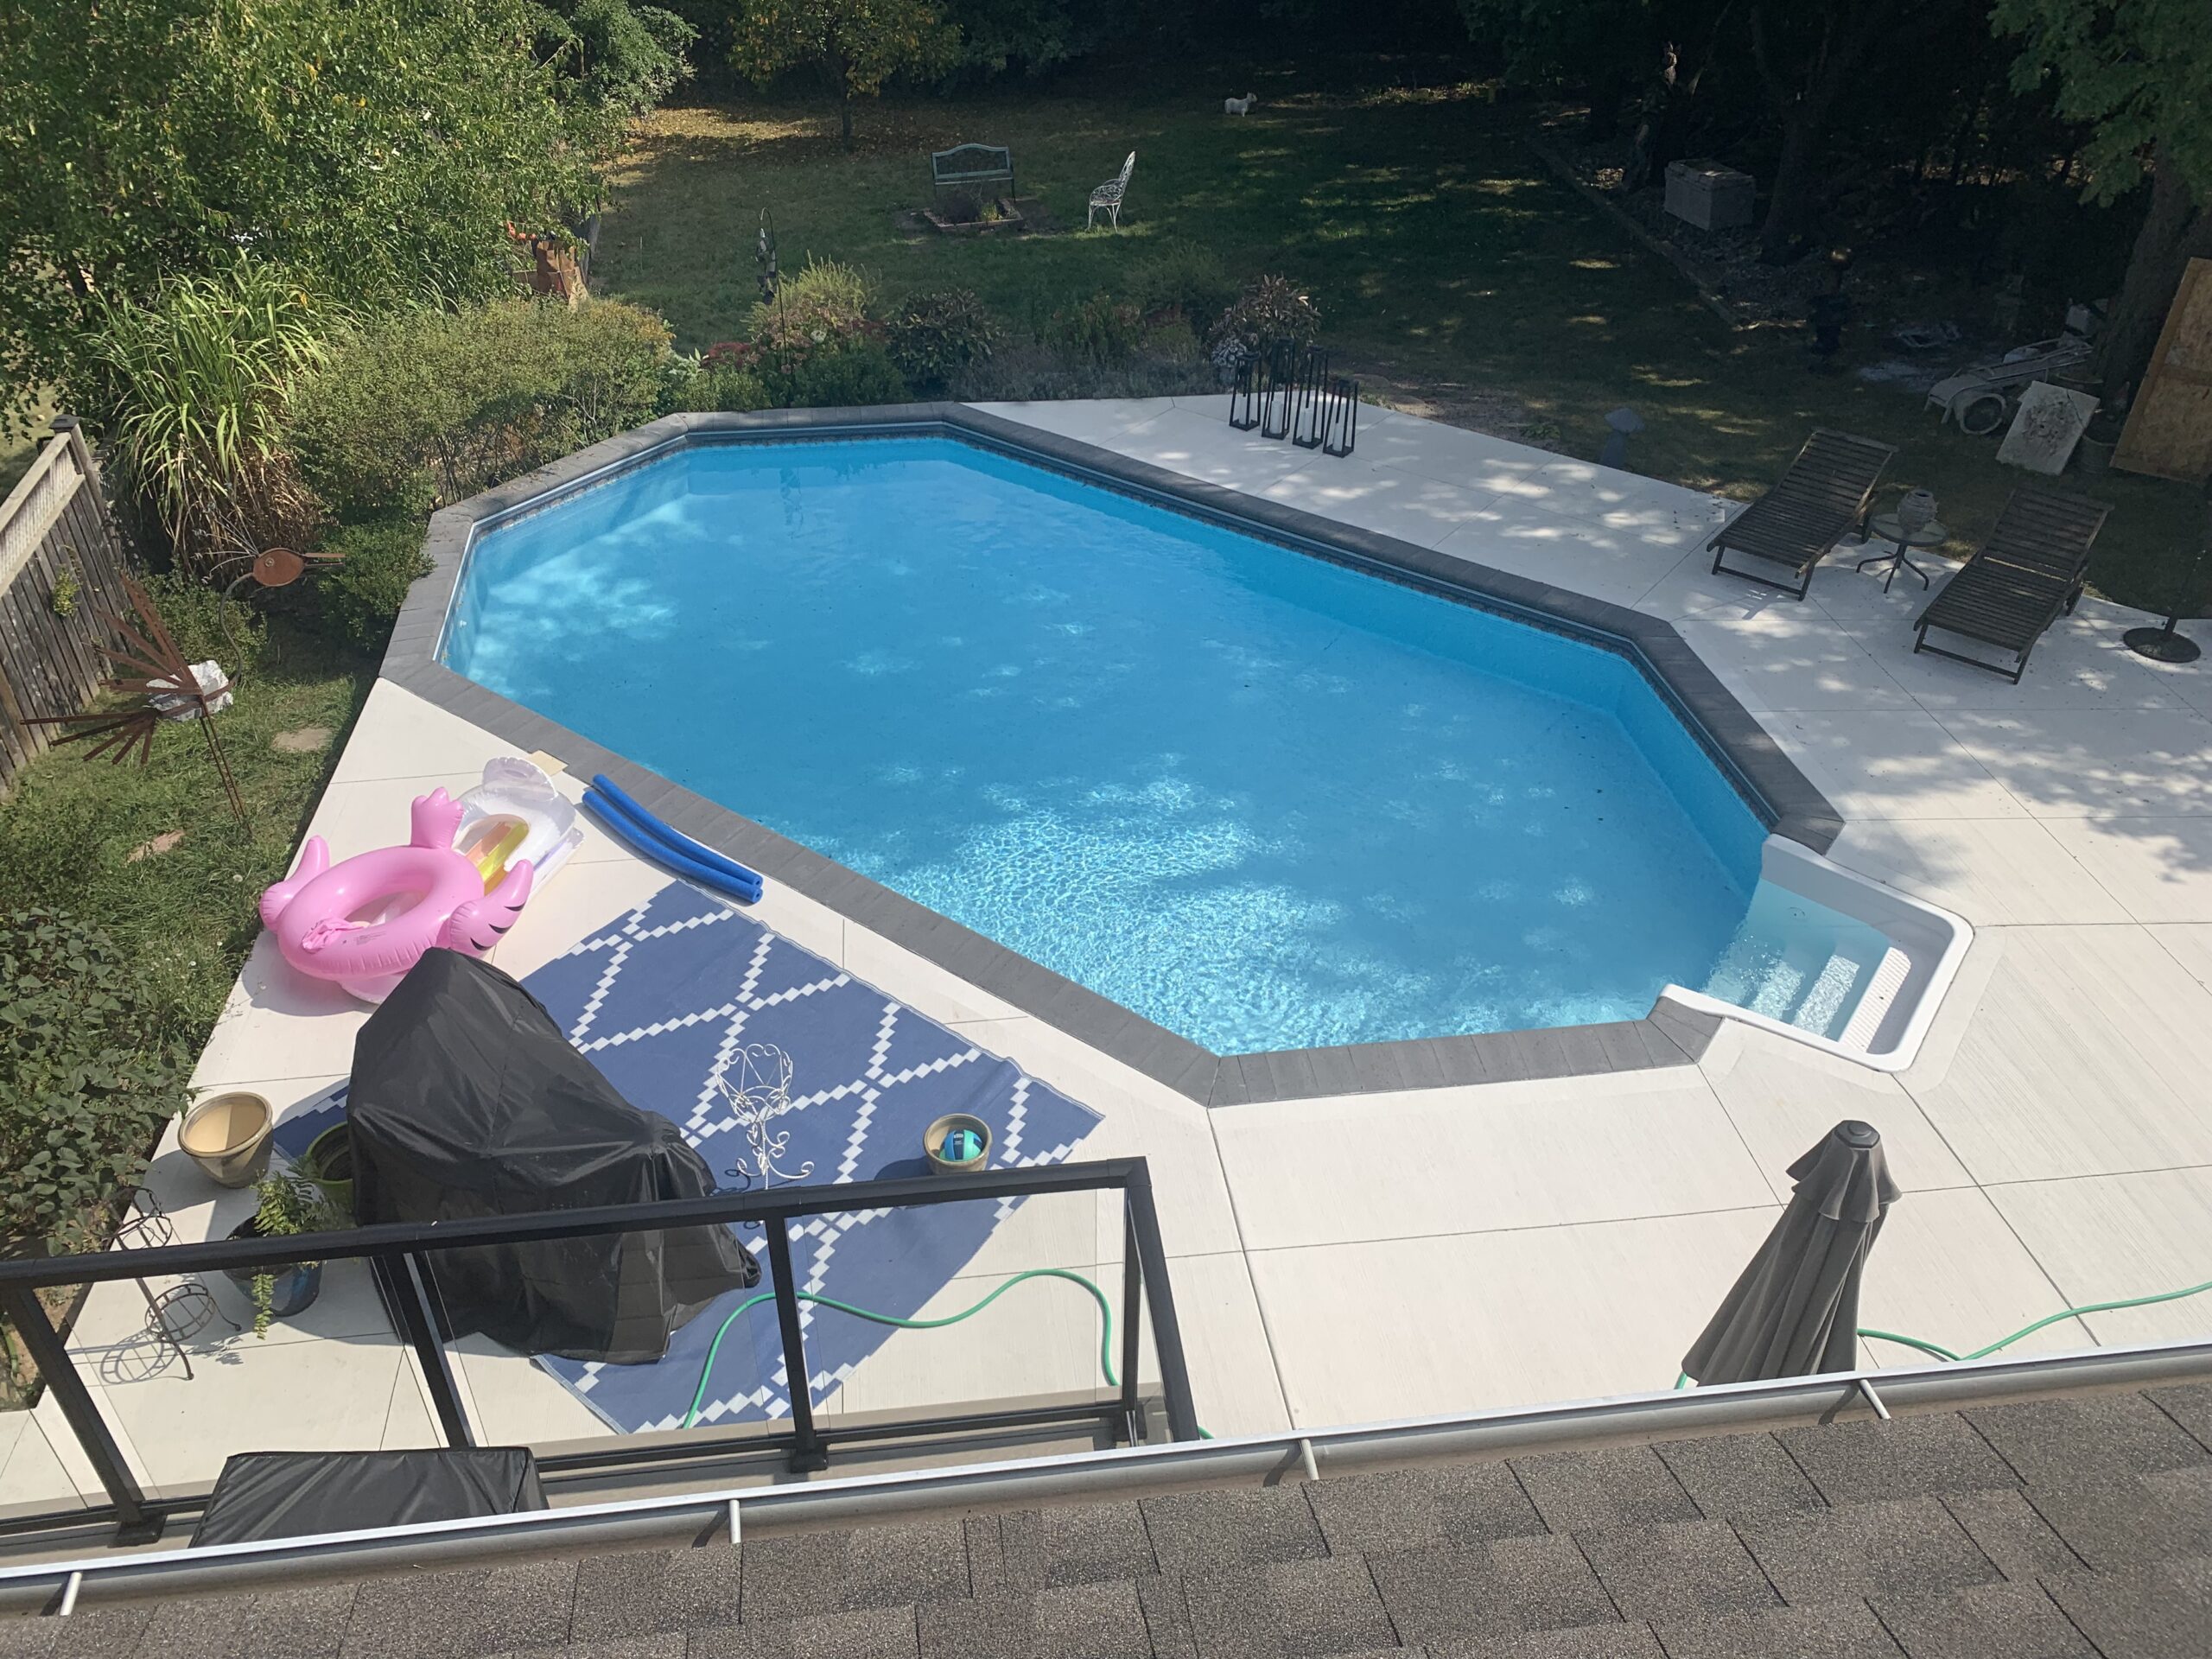
The days are getting shorter, the nights are getting cooler, and the time has come to close your swimming pool. If you are a first time pool owner, this article will help you learn how to close your swimming pool. I will be honest, I don’t do the entire thing myself, but I will go over the steps that I do before the pool company comes, and then describe what the pool company does for me. I do open the pool myself, so stay tuned in the spring for that how to article.
Tools you need
You don’t need much more than your usual maintenance equipment that came with the pool, but there a few additional items that will make the job easier.
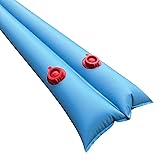


- Pool winter cover, water bags or other methods of securing the cover
- Stair cover
- Pump and hose
- Shop-vac
- Jet plugs
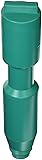
- Skimmer plug (Gizzmo)
- Pool chemicals
- Plastic bags and weights
Why is closing the pool so important?
If you live in a climate with cold winters with snow and ice, you know the damage that freezing water can do. That is basically the goal of winterizing your pool, to remove all water from the hoses and equipment so that they won’t be damaged if it freezes.
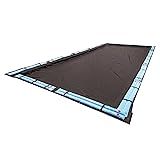
Types of Pool Winter Covers
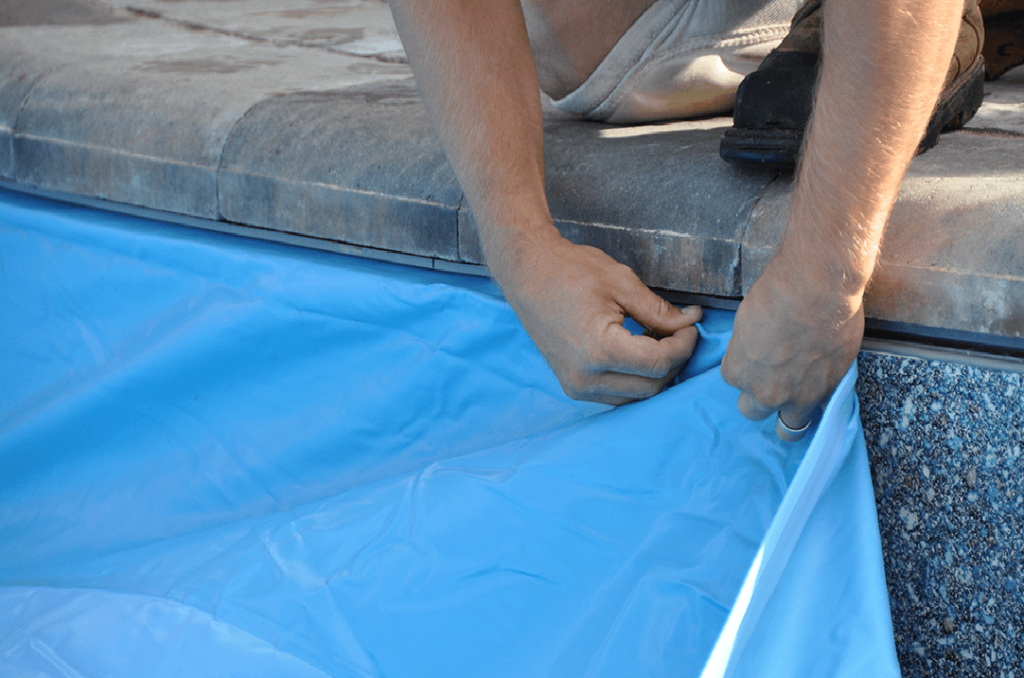
There are several different kinds of winter covers, with different pros and cons. My pool cover actually clips into the edge of the pool walls. There is also a hard cover for my stairs that the cover clips into as well. This provides a complete seal of the pool and prevents dirt, leaves and other unwanted things getting in your pool water during the winter. When you open your pool in the spring, your water will be fairly clean and it will be easier to get up and running. The cons of this type of winter cover are they need to be specially ordered, as they must fit the exact dimensions of your pool, and they can be more difficult to install. This is the main reason I get a company to close my pool for me.
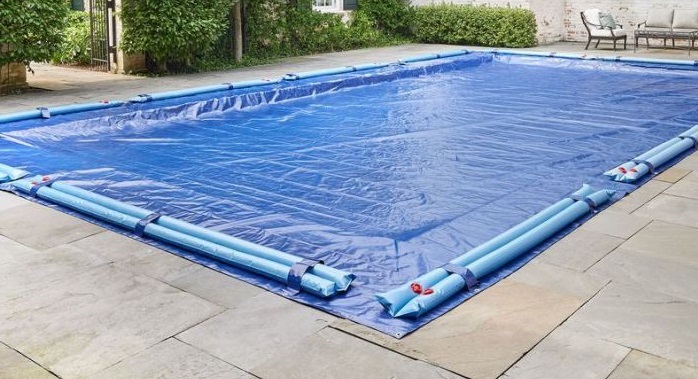
The second type of pool cover is basically a large tarp that you cover the pool with, then secure the edges with water bags. These are much easier to work with, and you can buy them off the shelf, just make sure it is large enough to cover your pool. The main issue I have seen with these covers is if there are any gaps in the water bags, heavy winds can sometimes blow the cover off and let dirty water into your pool. Also, the water bags may break which can lead to openings in the cover as well.
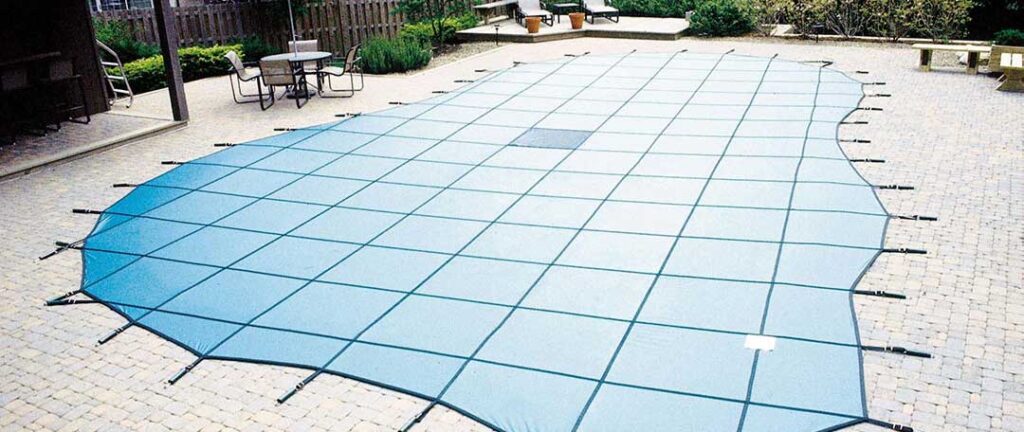
The last type of pool winter cover is called a safety cover. Clips are installed around the pool in your patio/deck and straps are connected to the cover. These straps are tightened so the cover is flat across the pool. This is safer because you don’t have to worry about where the edge of the pool is in the deep snow. It is also safer for pets as well. These covers tend to be more expensive, and you do have to put the clips into your patio/deck.
How to close your swimming pool
Step 1: Vacuum the pool
You want your pool water to be as clean as possible in the spring so you want to remove as much of the dirt and leaves before your close your pool. Give your pool a good vacuum and remove any floating debris with your net
Step 2: Lower the water level below the jets
In order to remove all of the water from the pipes, you need to lower the water level in the pool to below the skimmer and jets. This is were have a submersible pump can come in handy. Just attach the hose to the pump, put the pump in the pool, run the hose to where you drain water (the yard, the gutter in the street), and turn the pump on. Depending on the size of the pool and the pump, it will take a few minutes to a few hours to lower the water. I use a slightly different approach to lower the water. I ran the pump on backwash for a few minutes to get the water down almost to the bottom of the skimmer, then I simply put a garden hose in the pool and siphon the water out because my pool is at the top of a hill and gravity is free. It took almost a day with a regular garden hose but I had the time.
Step 3: Disconnect hoses and plugs
The next step is to prepare for removing the water from the system. You first want to remove the plugs from the heater, filter, pump and remove the nozzles from the pool jets. Put these in a safe place for opening the pool in the spring. One place to put the plugs is in the basket of the pump. Once the plugs are out, you can disconnect the pipes from the inlet of the pump and the outlet back to the pool.
Step 4: Blow out the lines
Using a Shop-vac on blower mode, put the nozzle into the pipes to and from your pool. You want to make sure all water is out of the system so you don’t have to worry about damage from freezing. Once the water is out, you can reconnect the hoses so water can’t get back in.
Step 5: Put in plugs
Back at the pool, you want to put plugs into all of the jets, and one in the skimmer, sometimes called a Gizzmo. You will have to take the basket out to reveal the opening of the pipe that you will screw the Gizzmo into. Another hint is to cut a piece of pool noodle about 6 inches (15cm) long to put in the skimmer beside the Gizzmo. This will reduce the amount of water that will get in during the winter that can freeze and cause more damage.
Step 6: Prepare your pool lights
If you have lights for your pool, they need to be winterized as well. They are normally underwater, so any water in them could freeze and damage them, so you want to submerge them into the remaining pool water for the winter. Simply unscrew them from the wall and place the fixture in a plastic bag with some heavy rocks and tie it tight. The rocks will keep the lights at the bottom of the pool safely underwater.
Step 7: Add pool chemicals
Just before you put the cover on, you want to add the chemicals to the water that will prevent algae from forming over the winter and guard against staining from any dirt that may have gotten in the water. These chemicals can be found at any pool supply store, most hardware stores and can be ordered from Amazon
Step 8: Putting on the winter cover
Once all of the water is out of the system, the plugs are in, the lights are bagged, and the chemicals are in the water, it is time to put on the cover. As I stated at the beginning, each type of cover has its pros and cons, so if you don’t like the winter cover that came with the pool when you bought the house, there may be other options. The main thing is to make sure the pool water stays as clean as possible over the winter so your startup in the spring is a lot smoother.
Step 9: Storing other pool components for the winter
Aside from winterizing the pool, you also want to store some of the other components in dryer places for the winter. These include the salt cell if you have a salt water pool and the pool pump. Disconnecting both of these and putting them in a shed or garage will help prolong their life and save you money in the long run. This is one thing I didn’t do and my pump seized after only a few years of operation. I learned a valuable lesson as pumps are not the cheapest!
Summary
I hope this information will help you close your swimming pool for the winter yourself. It will help save you money that you can use for your next project. Thanks for listening.
This site contains product affiliate links. We may receive a commission if you make a purchase after clicking on one of these links.