Hardwood floors bring warmth and character to any home. They are durable and add value. As a DIY lover, I’m excited to share how to install hardwood floors yourself. This guide is perfect for new projects or renovations.
It will teach you everything you need to know. You’ll learn how to transform your floors with beautiful, lasting hardwood.
Key Takeaways
- Understand the different types of hardwood flooring and their unique characteristics
- Learn about the essential tools and materials needed for a successful hardwood floor installation
- Discover the proper preparation steps, including subfloor assessment and moisture control
- Explore the various installation methods, such as nail-down, glue-down, and click-lock
- Get tips on working around obstacles and achieving a professional-looking finish
Understanding Different Types of Hardwood Flooring
Choosing the right hardwood flooring for your home can seem hard. But knowing the difference between solid and engineered hardwood makes it easier. Also, learning about different wood species and their features helps you pick the best flooring for your home.
Solid Hardwood vs. Engineered Hardwood
Solid hardwood floors are made from one solid piece of wood. Engineered hardwood has layers with a top layer of real wood. Solid hardwood is durable and can be refinished many times. But, it can be affected by moisture and temperature changes.
Engineered hardwood is more stable and better for areas with a lot of moisture. It’s a great choice for places with high humidity.
Popular Wood Species and Their Characteristics
- Oak – A classic choice known for its strength, durability, and distinctive grain patterns.
- Walnut – Offers a rich, dark color and a luxurious appearance, with a smooth and even texture.
- Hickory – Renowned for its exceptional hardness and distinctive knotty appearance, making it a popular choice for rustic or farmhouse-inspired designs.
- Maple – Prized for its creamy white color and fine, uniform grain, maple is a versatile option that can complement a variety of interior styles.
- Cherry – Boasts a warm, reddish-brown hue that darkens over time, creating a timeless and elegant look.
Pre-finished vs. Unfinished Options
Hardwood flooring comes in pre-finished and unfinished options. Pre-finished floors have a finish applied at the factory. This makes installation quick and easy.
Unfinished floors let you choose the stain and finish yourself. But, they need more time and effort to install and finish.
Essential Tools and Materials Needed
Starting a DIY hardwood flooring project means you need the right tools and materials. You’ll need everything from basic hand tools to specialized power equipment. It’s important to have all the necessary items for a successful installation.
First, you’ll need a reliable wood moisture meter to check the wood and subfloor’s moisture. Hardwood floors need a moisture level between 5-12% to avoid shrinking, buckling, or cracking. Also, test your subfloor’s moisture with a concrete moisture test, making sure it’s below 75% relative humidity (RH) before starting.
Other key tools include a tape measure for accurate measurements, a chalkline to mark floor joists, and a jamb saw for trimming door casings. A nail gun and air compressor are crucial for trim work and fastening the flooring. A sanding block and shop vacuum will help you get a smooth, professional finish.
Remember to have flooring spacers for expansion and contraction, flooring nails or staples, and wood putty for repairs. It’s also wise to have protective footwear to keep you safe during installation.
Even if you have some hardwood flooring tools and flooring installation materials already, you might need to rent or buy specialized equipment for your diy hardwood flooring project. Having the right tools and preparation can greatly improve your chances of getting a professional-looking result.

“Proper preparation and having the right tools can make all the difference in achieving a professional-looking result.”
Preparing Your Space for Installation
Starting a beautiful hardwood floor requires careful preparation of the installation area. This step is crucial for a lasting result. Let’s explore the essential steps to prepare your space for hardwood installation.
Removing Existing Flooring
Begin by removing any flooring, like carpet, laminate, or tile. This lets you check the subfloor and fix any issues. Always follow safety rules during removal to protect yourself and your area.
Subfloor Assessment and Preparation
After removing old flooring, inspect the subfloor closely. It should be clean, dry, and even. Any problems need fixing before installing hardwood. You might need to level the subfloor or repair damaged spots for a solid base.
Moisture Testing and Control
Checking the subfloor’s moisture is a key part of hardwood floor preparation. Too much moisture can damage the hardwood. Use a moisture meter to test it. If it’s too high, install a moisture barrier or let the subfloor dry fully.
By properly preparing the area, you’re ready for a successful hardwood floor project. Stay tuned for the next steps in the installation process!
How to Install Hardwood Floors: Step-by-Step Process
Installing hardwood floors can be a fun DIY project. It needs careful attention and detail. Let’s go through the steps to get a professional look. Remember, the key to hardwood floor installation steps, installing wood flooring, and hardwood flooring techniques is to take your time and follow the right steps.
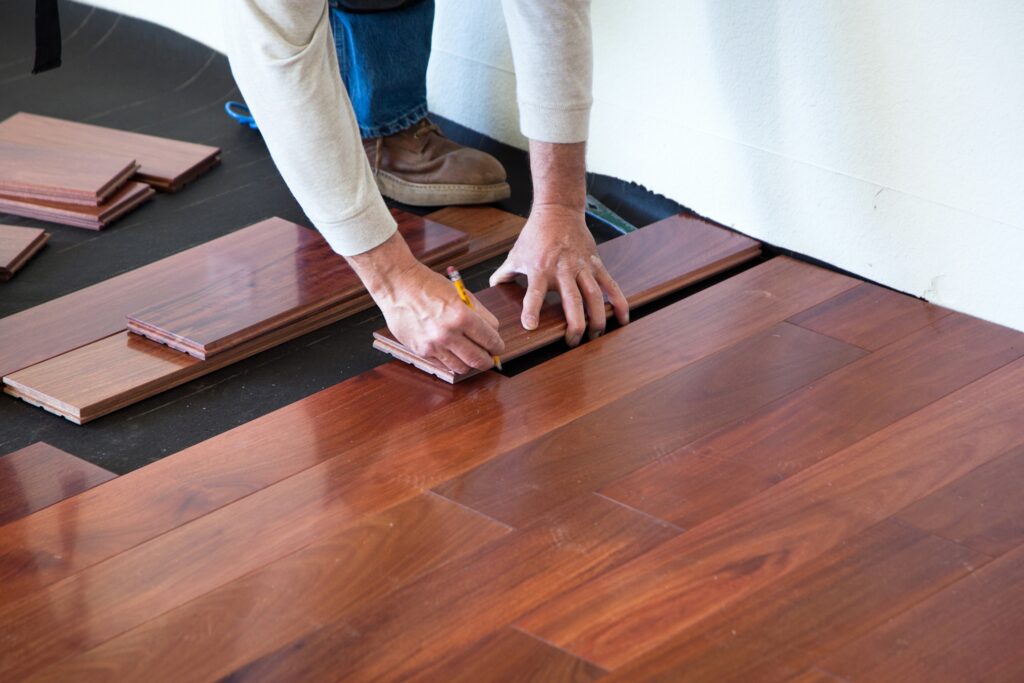
- Begin by laying out the first row of boards. Make sure they are straight and level. It’s wise to buy 10-15% more flooring than you think you’ll need for cuts and waste.
- Make an expansion gap around the room’s edges. Leave about 1/2 inch to 3/4 inch, depending on the hardwood type. This gap lets the floor expand and contract with the seasons.
- Stagger the end joints of the boards by at least 6 inches. This makes the floor stable and looks good. It’s key for the floor’s strength and life.
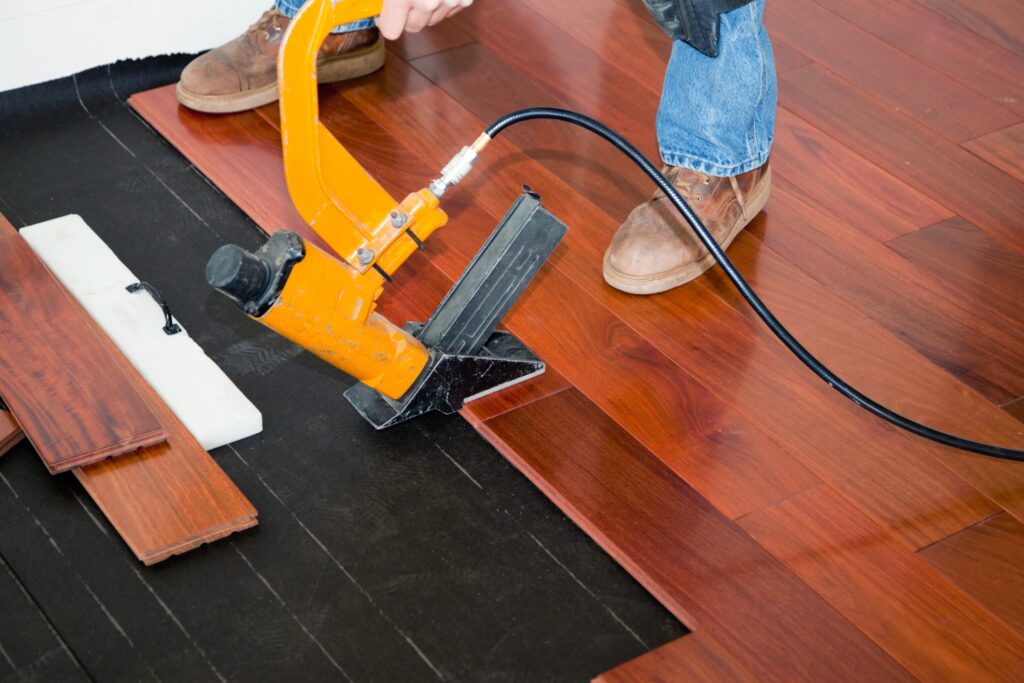
- Use a flooring nailer to secure the boards. Fasten them every 4 to 6 inches. This creates a tight fit between the boards.
- Keep the expansion gaps and staggered joints as you move across the room. Measure and cut boards to fit around obstacles and edges carefully.
Remember, proper acclimation of the hardwood flooring is essential before installation. The wood must adjust to your home’s temperature and moisture levels for 2 to 14 days. This depends on the season and board width.

By following these hardwood floor installation steps, you’ll get a beautiful and durable hardwood floor. It will make your home look and feel better.
Acclimating Your Hardwood Flooring
Proper acclimation is key for a successful hardwood floor installation. It lets the wood adjust to your home’s temperature and humidity. This prevents issues like gaps, buckling, or cupping later on.
The ideal humidity for wood flooring is between 30-50 percent all year. The temperature should be between 60° to 80° Fahrenheit. It’s wise to check the moisture content by sampling around 40 boards for every 1,000 square feet of flooring upon delivery.
For solid strip flooring, the moisture content should not vary by more than 4 percent from the subfloor. Wide plank solid flooring should not vary by more than 2 percent. The goal is to keep the wood’s moisture content between 6-to-9 percent to avoid shrinking or swelling.
Acclimation time for hardwood flooring is usually at least three days. However, for site-finished and engineered flooring, 5-7 days is recommended. This is crucial for engineered wood, as the adhesives need time to acclimate before the finish is applied.
Tropical wood species might need longer acclimation times. This is because they absorb moisture at different rates and have varying oil content. Always follow the manufacturer’s guidelines to keep warranties valid and ensure a good installation.
“Acclimating your hardwood flooring is a critical step that shouldn’t be skipped. Failing to do so can lead to major issues down the line, so be patient and allow the proper time for your floors to adjust to the new environment.”
Installation Methods and Techniques
There are many ways to install hardwood floors, each with its own benefits. Knowing the different techniques helps you pick the right one for your project. This ensures your hardwood floor lasts a long time and looks great.
Nail-Down Installation
The nail-down method is common for thinner solid wood floors. It uses a pneumatic nailer to attach the floorboards to the subfloor at a 45-degree angle. This method is strong but needs a solid subfloor and is more work.
Glue-Down Method
The glue-down method is used for engineered wood and parquet floors. It involves applying adhesive to the subfloor and pressing the planks into it. This method works well on concrete or wood subfloors and holds strong. But, you must prepare the subfloor well and use the right trowel size.
Click-Lock Installation
Click-lock flooring is a favorite for its floating floor setup. It doesn’t need adhesive or nails, just clicks together. This makes it easy to install over different subfloors, like concrete or vinyl. It’s a good choice for DIY projects.
Choosing the right installation method is key. Make sure to prepare the subfloor, measure and cut the boards right, and follow the manufacturer’s guide. This way, your hardwood floor will be installed well and last long.
Working Around Obstacles and Special Cases
Installing hardwood floors can be tricky, especially around vents, doorways, and odd shapes. But, with the right methods and a bit of creativity, you can overcome these challenges. This way, you’ll get a smooth, professional finish.
Cutting and Fitting Boards Around Vents
For vents, the trick is to make exact cuts with a jigsaw. Measure the vents well, then cut the boards to fit perfectly. This ensures a clean, tight fit that keeps your flooring looking great.
Navigating Doorway Transitions
Doorways can be tricky for hardwood floors. To make a smooth transition, undercut the door jambs and casings. Use a jamb saw or oscillating multi-tool to cut the door frame. This lets the flooring slide under smoothly, giving a clean finish without affecting the door.
Cutting Around Irregular Shapes
In rooms with odd shapes, like alcoves or angled walls, you’ll need to think outside the box. A jigsaw is your best tool for making custom cuts. Take your time, measure carefully, and test your cuts to get the perfect fit.
No matter the obstacle, remember to leave expansion gaps around the room and fixed objects. This lets the wood expand and contract with temperature and humidity changes, avoiding damage to your flooring.
Mastering the art of working around vents, doorways, and odd shapes lets you install hardwood floors anywhere in your home. With patience, precision, and the right tools, you can create a stunning, seamless hardwood floor. It will enhance your living space beautifully.
Installing the First and Last Rows
Installing hardwood flooring starts with the first and last rows. These rows are key and need extra care. The first row sets the project’s foundation, so it must be straight and level. The last row also has its own challenges, requiring careful handling for a smooth finish.
Setting Proper Expansion Gaps
Expansion gaps are vital in hardwood flooring. They are usually 1/2 inch wide and let the wood adjust to temperature and humidity changes. Without these gaps, the wood can buckle or cup, causing damage.
To get the gaps right, start the first board 1/2 inch from the wall. This gap will be matched by the last row, allowing the wood to move freely.
Cutting and Fitting End Pieces
The last row can be tricky, needing custom-fit end pieces. You might use a pry bar to fit the final boards tightly, keeping the expansion gap intact. Sometimes, face-nailing is needed where the nailer can’t reach, like along walls.
By carefully installing the first and last rows, you ensure a beautiful, durable hardwood floor. It will impress your neighbors.
Finishing Touches and Trim Work
As the hardwood floor installation nears completion, it’s time to focus on the finishing touches. These touches will give your new flooring a polished, professional look. This includes installing baseboards, shoe molding, and transition pieces.
When it comes to baseboards and shoe molding, I recommend carefully measuring and cutting these trim pieces. This ensures a proper fit that covers the expansion gaps while allowing for natural wood movement. For a clean, uniform appearance, I suggest using a miter saw to make precise cuts at the corners.
In addition to baseboards and shoe molding, you may need to install transition pieces at doorways, thresholds, or where the new hardwood flooring meets other flooring materials. These transition pieces, such as T-moldings or reducers, will help create a smooth, level transition between surfaces. Again, be sure to follow the manufacturer’s instructions for proper installation techniques.


