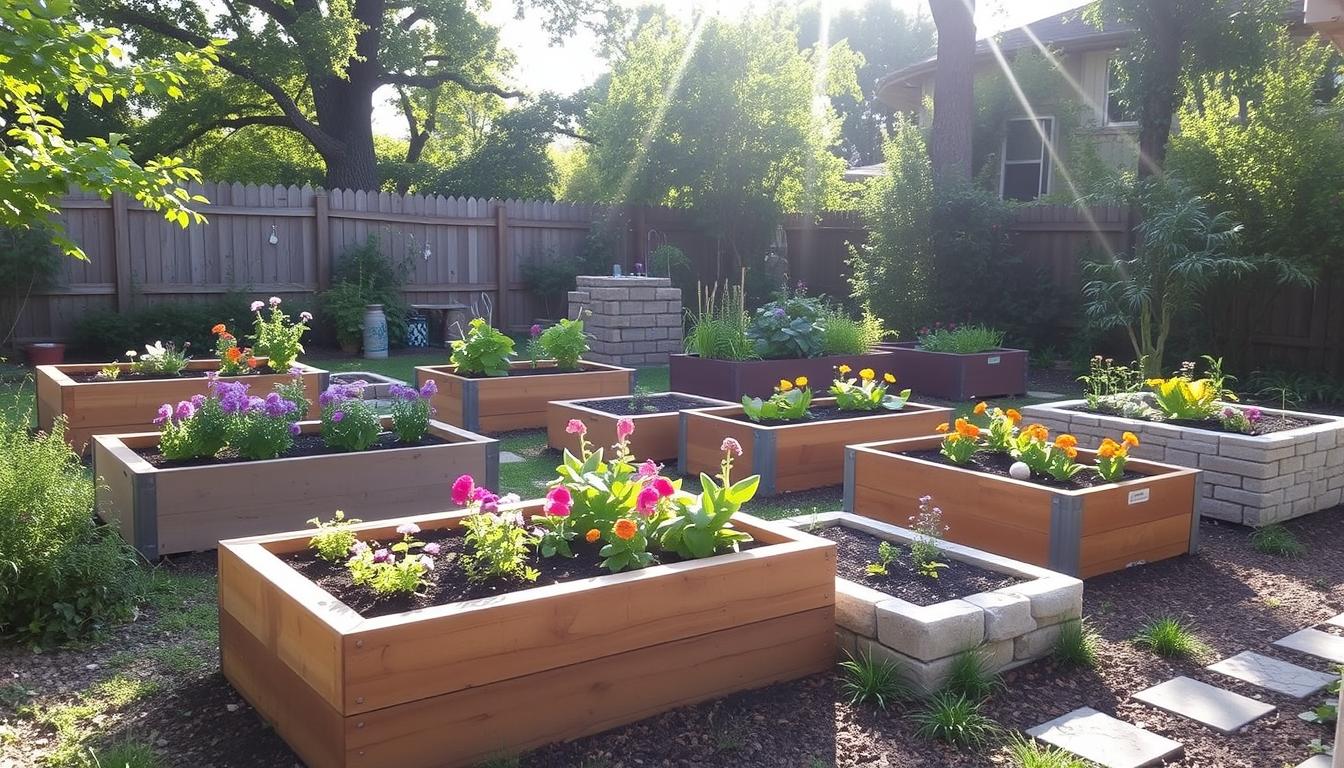
In recent years, DIY raised garden beds have become very popular. They are great for those with little space, rocky ground, or shaded backyards. Building these beds is easy on the back and makes gardening better. It also improves soil quality and boosts crop yields.
When planning raised garden beds, think about size, spacing, materials, and where to put them. A good plan can turn your garden into a productive space, no matter the challenges. Let’s explore the key steps and things to consider when building these useful garden structures.
Key Takeaways
- Adopt DIY raised garden beds to address limited or challenging garden spaces.
- Plan bed dimensions carefully: ideal max width is 4 feet; max length is 8-10 feet.
- Proper spacing (28-48 inches) between beds allows for easy access and tool movement.
- Selected materials impact durability and overall project costs; cedar wood is highly recommended.
- Consider optimal sun exposure and appropriate site preparation for thriving garden beds.
Introduction to DIY Raised Garden Beds
DIY raised garden beds are a hit with both new and seasoned gardeners. They’re great for improving your gardening skills. These beds let you grow plants in places with bad soil or little space.
One big plus of DIY raised garden beds is how you can customize them. You can make them any height or shape you need. For example, I built a set of 12 beds in early 2023. Each was 8 feet long, 4 feet wide, and 20 inches tall. This made harvesting easier and less tiring.
Many gardeners choose raised beds to control the soil. You can mix different soils, compost, and organic matter in each bed. I used 18-20 inches of topsoil from my old garden and added 2 inches of compost on top.
Choosing the right spot for your garden beds is key. I picked a spot that got at least 8 hours of sunlight, perfect for most veggies. The beds should be big enough to reach into easily, with heights between 6 to 24 inches for roots.
Adding raised garden beds to your garden is fun and practical. You can make them simple or complex, taking a weekend to build. My project used 72 hemlock boards and cost about $900. The paths between the beds were 3 feet wide, making it easy to move around.
If you’re curious about how to build elevated garden beds, this guide will help. You can grow many types of plants in a well-made raised bed. Kids can even help, making it a fun learning experience for everyone.
Next, we’ll dive into the details of planning, building, and caring for your DIY raised garden beds. We’ll make sure your gardening projects are a success and lots of fun.
- Plan and design your garden layout carefully.
- Select high-quality, durable materials.
- Ensure proper soil and compost mixtures.
- Regularly maintain and monitor raised beds.
- Experiment with different plant varieties.
- Encourage family participation for a rewarding experience.
Benefits of DIY Raised Garden Beds
Creating your own raised garden beds has many benefits. It’s not just about making a space to grow plants. It’s about enjoying the process and seeing your garden flourish.
Soil Quality
One big advantage is controlling soil quality. You can mix the soil to match what your plants need. This is great for plants that prefer certain soil types.
For example, most vegetables do best in slightly acidic soil. Raised beds make it easy to keep the soil just right for them.
Drainage
Another big plus is the superior garden bed drainage. Raised beds don’t get waterlogged like regular gardens can. This is because you can mix in materials that help water drain well.
Root vegetables like carrots and radishes grow better because of this. They don’t get waterlogged and rot.
Comfort and Accessibility
Raised beds are also great for comfort and accessibility. They’re easier to work in, especially for people with mobility issues. You can make them up to 24 inches high for less strain.
It’s also good to leave space between beds. This makes it easier to move around and take care of your garden.
Aesthetics
DIY raised garden beds can also make your garden look better. You can choose materials and designs that fit your garden’s style. They make your garden look neat and organized.
Higher Yield
Raised beds can also help you grow more. The better soil and drainage mean healthier plants. This can lead to more and better crops.
Planting certain plants together can even increase yields. For example, basil near tomatoes can make the tomatoes taste better and keep pests away.
Engaging DIY Project
Building and taking care of raised garden beds is a fun DIY project. It’s a great way to spend time outside, especially when you can’t go out as much. It’s also a great way to teach kids about gardening.
Studies show kids are more likely to try new vegetables if they help grow them. It’s a great way to bond as a family.
| Aspect | Benefit |
|---|---|
| Soil Quality | Customized soil for better plant growth |
| Drainage | Prevents waterlogging and promotes healthy roots |
| Comfort & Accessibility | Reduces physical strain, ideal height for easier gardening |
| Aesthetics | Neat and organized garden layout |
| Higher Yield | Increased crop production due to optimal conditions |
| Engaging DIY Project | Encourages family bonding and educational activities |
Choosing the Right Location for Your Raised Garden Beds
When picking a spot for your raised garden beds, think about a few key things. You need to check the sunlight, soil, and drainage. Let’s look at each one to help you make your garden beds a success.
Assessing Sunlight
Sunlight is very important when choosing a spot for your garden. Most plants need 6 to 8 hours of direct sunlight each day. For example, tomatoes and carrots need full sun to grow well.
But, some plants like lettuce and dill can do well with just 4 hours of sunlight.
If your spot gets only partial shade, remember this rule: 2 hours of shade is like 1 hour of sun. Knowing this helps you place your garden beds for the best results.
Checking Soil Conditions
Even though you’ll use new soil in raised beds, it’s good to check the soil below. Use a soil testing kit to see the pH and nutrient levels. Good soil quality from the start helps your plants grow strong and healthy.
Ensuring Proper Drainage
Drainage is also key. Make sure your spot doesn’t hold water and that the soil drains well. Good drainage stops root rot and other problems. Also, a flat area is easier to work with and maintain.
By carefully looking at these factors, you can find the perfect spot for your raised garden beds. This will help your garden grow lush and productive.
| Factors | Details |
|---|---|
| Sunlight | 6+ hours per day for most crops; 4 hours minimum for baby greens and herbs. |
| Soil Conditions | Test pH and nutrient levels; ensure good quality and fertility. |
| Drainage | Avoid areas with standing water; ensure soil permeability. |
Selecting Materials for Building Raised Garden Beds
When picking materials for garden beds, look for durability, safety, and value. Wood is a top choice. Choosing wood for planters means finding types that resist decay and insects. Cedar and redwood are great because they resist water well, but they cost more.
Pressure-treated lumber is cheaper but make sure it’s safe. The EPA banned a harmful chemical in 2003.
Using recycled pallets or scrap wood is smart and eco-friendly. Make sure the pallets are heat-treated, not chemically treated. Concrete blocks or bricks are also good for building strong beds. They stand up to weather well.
Build your bed to standard sizes. Sizes range from 4×4 to 4×8 feet, with heights from 12 to 24 inches. Mix one-third compost with topsoil and sand for good soil.
Keep the bed width under 4 feet for easy access.
| Material | Quantity | Dimensions |
|---|---|---|
| Cedar or Redwood | 10 pieces | 10-foot sections of 2-by-4s |
| Support Posts | 10 pieces | 10-1/2 inches |
| Compost | Varies | 1/3 of the bed’s volume |
While cedar and redwood last long, pressure-treated wood needs six months to dry.
The right bed height makes gardening easier. A 4×6 bed with a 10-1/2 inch height is popular. It’s easy to maintain and good for plants.
Designing Your Raised Garden Bed Plan
Creating a raised garden bed plan involves several key factors. The size, shape, height, and number of beds are all important. You should also think about features like trellises or fencing.
Size and Shape Considerations
The size of raised garden beds is crucial. They should be no more than 4 feet wide for easy access. Length should not go over 8 feet to avoid stress on the sides.
For bigger gardens, you might need to split longer beds. The space between beds should be 28 to 48 inches. This makes it easy to move around.
Height of the Beds
The height of the beds affects how easy it is to reach plants and how well they grow. Beds are usually 12 to 24 inches high. This height is good for most plants and helps with drainage.
Taller beds, around 24 inches, are better for people with mobility issues. They make it easier to reach plants without straining.
Number of Beds
Deciding how many beds to have is important. You need to think about the space you have, crop rotation, and what plants you want to grow. A good layout helps with upkeep and picking crops.
Having clear paths, like 3-feet-wide paths for wheelbarrows, makes maintenance easier.
Additional Features (Trellis, Fencing)
Adding features like trellises or fencing can make your garden better. Trellises help climbing plants grow. Fencing keeps pests out.
These features should be part of your garden bed plan. They help make your garden more functional and pretty.
Preparing the Ground and Leveling Your Site
Before starting your raised garden beds, make sure the ground is ready. This means doing a few important steps to help your plants grow well. These steps help avoid problems like bad drainage or pests.
Clearing the Area
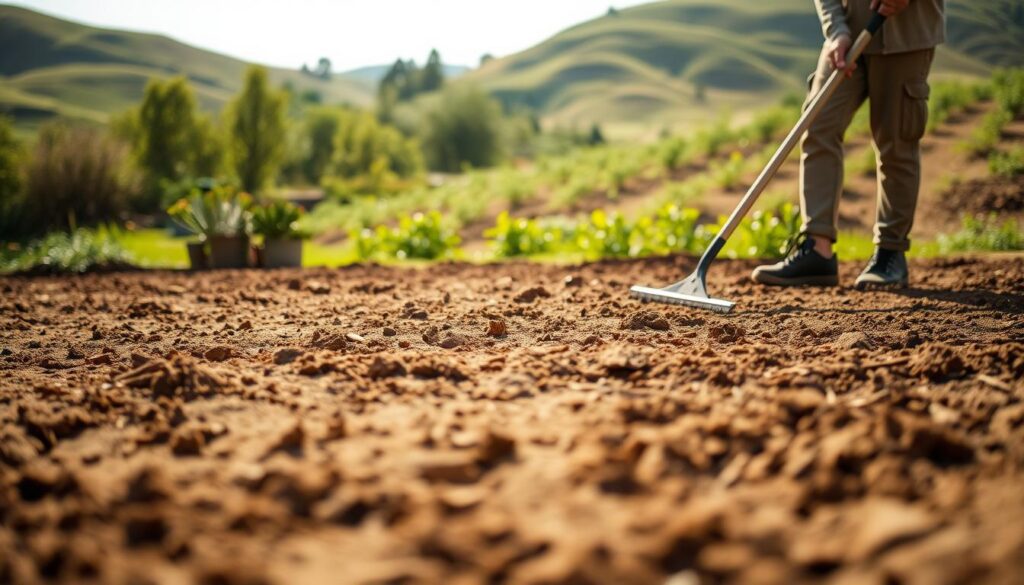
The first thing to do is clear the area. Remove any plants, debris, or big stones that could get in the way. It’s important to get rid of weeds and grass to give your plants a better chance to grow. Use a spade or weed trimmer to make the ground clean and ready for the next step.
Leveling the Ground
Leveling the ground is key to stop water from pooling. It also makes sure your raised beds have a solid base. Start by using a shovel and rake to even out the soil. For even better leveling, use a longboard and a spirit level.
This might take some time, but it’s worth it. A well-leveled bed is essential for your plants to thrive.
Lining the Bottom of the Bed
After leveling, line the bottom of the bed. This is especially important if pests like gophers are a problem. Use a hardware cloth or similar material to keep pests out and weeds down. It also helps with drainage. Make sure to secure the lining to the bed frames before adding soil.
DIY Raised Garden Beds: A Step-by-Step Guide to Planning and Building
Starting a DIY raised garden bed project is rewarding and productive. This guide helps DIY fans plan and build garden beds easily. It ensures your garden beds are useful, look good, and help plants grow well.
- Selecting Your Location: Pick a sunny spot for your plants. Southern-facing gardens in the northern hemisphere get the most sun.
- Designing Your Garden Bed: Beds should be 4 feet wide and 8-10 feet long. This makes them easy to reach and prevents them from bending. A height of 16½ inches is good for plants and comfort.
- Materials: Use strong woods like redwood. You’ll need nine 8-ft. 2×6 boards for sides and ends. Also, eight 8-ft. 4×4 posts cut to 24 inches for corners.
It’s key to space your raised garden beds right. Paths should be 3 ft. wide for wheelbarrows. This makes it easier to get around and take care of your garden.
| Element | Specification |
|---|---|
| Bed Width | Maximum 4 feet |
| Bed Length | 8-10 feet |
| Height | 16½ inches |
| Path Width | 3 feet |
Preparing the ground and leveling it is important in the building raised beds tutorial. Clear the area, level it, and line the bed with hardware cloth and landscape fabric. This stops pests and weeds.
By following this guide, you can build your raised garden beds with confidence. Every step, from planning to building, is covered for a successful gardening experience.
Cutting and Assembling the Wooden Boards
When you start making raised garden beds, it’s important to cut the wood right. This makes your garden bed strong and look good. You need the right tools and know-how to do it well.
Tools Required
To start making garden beds, you’ll need some key tools:
- Measuring tape
- Speed square
- Saw (circular or hand saw)
- Power drill
- Kreg Jig (optional for hidden screws)
- Clamps
- 8 gauge deck screws (2.5 to 3 inches long)
Measuring and Cutting the Boards
First, measure your wood carefully. Raised garden beds should be no longer than 8 feet. They can stretch up to 10 feet if needed. Make sure the boards fit your plan and are not wider than 4 feet for easy access.
- Measure each board to the right length with a tape and pencil.
- Use a speed square to draw straight lines.
- Cut the boards along your lines for smooth edges.
Securing the Corners
It’s key to make the corners strong for your garden bed to last. Use 4 x 4-inch redwood for corner supports. Here’s how to do it:
- Place each corner support at right angles with the bed sides.
- Clamp the boards together for stability.
- If you have a Kreg Jig, drill holes and use hidden screws for a clean look.
- If not using a Kreg Jig, drill pilot holes and screw into the supports with 8 gauge deck screws. Keep the screws apart to avoid splitting the wood.
Choosing the right tools and following these steps makes building raised garden beds easy and fun. A well-made garden bed not only looks great but also works better and lasts longer.
Building and Installing Support Structures
Building durable garden beds needs careful planning. Strong support is key for soil weight and weather. Here are some tips for building sturdy garden beds.
Internal Supports
Internal supports are vital for garden bed strength. Use materials like galvanized steel brackets or treated lumber. Cut wood accurately and fasten joints well.
Galvanized steel brackets are great because they don’t rust. They can last for decades.
For durable garden beds, space supports evenly. Place them every 2-3 feet to spread soil weight. This prevents bowing or sagging.
External Supports
External supports add extra strength. Use corner posts from treated lumber or cedar. These posts should go 12-18 inches deep in the ground.
Also, add cross-bracing at the bed’s midpoint. This keeps sides stable and prevents bowing. Use metal rods or wooden planks and fasten them well.
Install hardware cloth or landscape fabric at the base. This protects against pests and weeds. It makes your bed last longer and helps plants grow better.
By using these raised bed construction tips, you’ll make durable garden beds. They will last for many seasons, keeping your garden healthy.
Installing the Bottom and Adding Drainage
Drainage systems in raised garden beds are key to stop waterlogging and help plants grow well. By carefully picking and placing drainage materials, you make your garden bed last longer and grow better.
Choosing Drainage Materials
When setting up garden bed bases, picking the right materials is crucial. Gravel, coarse sand, and crushed stone are good choices. They make a strong base and let water flow out easily. Also, using hardware cloth and landscape fabric keeps pests and weeds out, protecting the soil.
Creating Drainage Holes
To better drain raised beds, add drainage holes at the bottom. The holes’ number and size depend on the bed’s size, usually 4×8 feet, 12-24 inches high. Placing holes right helps water flow and stops root rot. Drill holes 6 to 12 inches apart for best results.
Using these methods helps set up garden bed bases well and keeps your plants healthy. Good drainage and careful planning make your garden bed assembly successful.
Lining and Filling Your Raised Garden Beds
Getting your raised garden beds ready is key for healthy plants. You need to pick the right liner, choose good soil, and add compost and nutrients.
Choosing the Right Liner
The right liner is the first step to a great garden bed. It keeps the soil in and lets water drain well. I suggest using heavy-duty landscape fabric. For extra protection, add chicken wire with 5/16″ staples to keep pests out and help the soil stay in place.
Filling with Quality Soil
Using top-notch soil is vital for your plants. Mix soil for raised beds, compost, and manure for the best results. In Southern California, a blend of potting soil, compost, and manure works well. Fill the bed to 1″ below the top to avoid spills when watering.
Adding Compost and Nutrients
Adding compost boosts your garden’s nutrient levels. It makes the soil richer in organic matter. You can also add organic fertilizers like bone meal or worm castings to keep your garden healthy.
| Step | Materials Needed | Quantity |
|---|---|---|
| Line the Bed | Heavy-duty landscape fabric, chicken wire, 5/16″ staples | As required |
| Fill with Soil | Soil for raised beds, compost, manure | 8 bags approx. |
| Add Compost | Compost, organic fertilizers | Enough to cover the soil surface |
Staining or Painting Your Raised Garden Beds
Staining or painting your raised garden beds is key to making them last. It keeps them looking good for years. The right finish and application can make your wooden planters last longer and add color to your garden.
Choosing the Right Finish
Choosing the right stain and paint for outdoors is crucial. Look for products made for the outside. They protect against UV rays, moisture, and mildew. Make sure the finish is safe for plants, especially if you grow food.
Applying Stain or Paint
Before applying stain or paint, make sure the wood is clean and dry. Lightly sanding the surfaces helps the finish stick better. Here’s how to do it right:
- Apply a primer suited for outdoor use to enhance durability.
- Use a high-quality brush or sprayer to ensure even coverage.
- Allow the first coat to dry thoroughly as per the manufacturer’s instructions.
- Apply a second coat for added protection and a richer finish.
Sealing for Longevity
Sealing your wooden planters is vital to protect them from rot and weather damage. A clear, water-resistant sealer keeps moisture out and preserves the wood’s beauty. Make sure to seal all edges and corners to prevent water from getting in.
| Product | Use | Pros | Cons |
|---|---|---|---|
| Exterior Wood Stain | Staining | Rich Color, UV Protection | Requires Reapplication |
| Outdoor Paint | Painting | Wide Color Range, Strong Protection | May Chip Over Time |
| Clear Sealant | Sealing | Preserves Wood Look, Easy Application | Requires Regular Maintenance |
By carefully choosing the right stain and paint for outdoors and diligently maintaining the finish, you can ensure that your finishing garden beds remain both functional and beautiful.
Optional Features: Adding a Trellis or Fence
Adding a garden bed trellis or fencing to your raised beds can make your garden better. These raised bed accessories help climbing plants grow and protect against pests and animals.
- Garden Bed Trellis: A trellis is great for climbing plants like tomatoes, cucumbers, or beans. Place it at the back of the bed for easy access. Make sure it’s strong enough to hold the plants’ weight.
- Fencing for Planters: Fencing keeps pests like rabbits or deer out. A 5-foot high galvanized fence marks your garden and keeps intruders away. Make sure the fence posts are buried deep for stability.
When planning your raised bed, remember the right sizes and spacing. These tips help your plants grow better and your garden look neat:
| Raised Bed Feature | Guideline |
|---|---|
| Bed Length | Up to 8 feet (10 feet maximum) |
| Bed Width | Not exceeding 4 feet for easy access |
| Spacing Between Beds | 28 inches minimum; preferably 36-48 inches |
| Height of Fence | 5 feet |
Using raised bed accessories like trellises or fences improves plant health and your gardening experience. Start with these simple steps for a productive and beautiful garden.
Maintaining Your Raised Garden Beds
Taking care of your raised garden beds is crucial for their long-term health and productivity. This includes preparing for each season, keeping the soil healthy, and preventing pests. Here, I’ll share the key steps for caring for your garden beds all year round.
Seasonal Maintenance
Keeping your garden beds in great shape requires regular care. Remove dead plants at the end of the growing season to stop diseases and pests. In spring, add compost to refresh the soil. Mulching also helps by keeping moisture in, controlling weeds, and keeping the soil temperature right.
Preventing Pests
Stopping pests is essential to protect your plants. Use organic methods like companion planting and picking pests by hand. You can also use row covers or netting to keep insects away.
Soil Health Management
Good soil health is key for strong plant growth. Add compost regularly to feed the soil with vital nutrients. Crop rotation is also good, as it stops soil from getting worn out and breaks pest cycles.
By combining these steps, you can keep your garden beds healthy and thriving. This way, your garden will flourish season after season.
| Maintenance Task | Frequency | Benefits |
|---|---|---|
| Weeding | Weekly | Removes competition for nutrients |
| Adding Compost | Seasonally | Improves soil fertility |
| Mulching | As Needed | Controls weeds and retains moisture |
| Inspecting for Pests | Weekly | Prevents infestations |
| Watering | As Needed | Ensures proper hydration |
Common Plant Choices for Raised Garden Beds
Raised garden beds are great for growing many plants. They help control soil, improve drainage, and make it easier to reach plants. When picking plants for raised beds, think about the veggies, herbs, and flowers that do well here.
Vegetables
Growing vegetables in garden beds is very rewarding. Most veggies need about 10 inches of soil, making raised beds perfect. Start with these popular ones:
- Tomatoes
- Peppers
- Lettuce
- Carrots
- Spinach
- Zucchini
Make sure to space them right:
| Vegetable | Spacing (inches) |
|---|---|
| Tomatoes | 24-36 |
| Peppers | 18-24 |
| Lettuce | 8-12 |
| Carrots | 2-3 |
| Spinach | 6-8 |
| Zucchini | 24-36 |
Herbs
Growing herbs in planters and raised beds is very popular. Herbs need less space and are easy to care for:
- Basil
- Parsley
- Thyme
- Oregano
- Rosemary
- Mint
Think about making a kitchen herb garden. Here’s how to arrange them for best growth:
| Placement | Herbs |
|---|---|
| Front | Oregano, Cilantro, Parsley |
| Middle | Thyme, Sage, Rosemary |
| Back | Chives, Basil |
Flowers
Flowers make raised garden beds beautiful and attract good bugs. They also make the garden look better. Some favorites are:
- Marigolds
- Zinnias
- Pansies
- Cosmos
- Petunias
- Daisies
When planting flowers, space them well to avoid crowding and disease. Mixing veggies, herbs, and flowers in your plants for raised beds uses space well. It also makes a lively, diverse garden.
How to Maximize Yield in Your Raised Garden Beds
To get the most from your raised beds, use smart techniques. Companion planting, succession planting, and vertical gardening boost your garden’s output. Let’s dive into these strategies.
Companion Planting
Companion planting pairs different crops to improve growth and fight pests. It’s about knowing how plants interact. For example, basil with tomatoes tastes better and keeps pests away.
| Common Combinations | Benefits |
|---|---|
| Tomatoes & Basil | Improves flavor, repels insects |
| Carrots & Onions | Deters pests |
| Corn & Beans | Mutual support |
Succession Planting
Succession planting keeps your harvest going all season. Plan your planting to ensure a steady flow of fresh produce. It’s great for quick-growing crops like lettuce and radishes.
- Early Spring: Lettuce, radishes, spinach
- Mid-Summer: Bush beans, beets
- Late Summer: Kale, broccoli
Vertical Gardening Techniques
Vertical gardening maximizes space. It keeps plants from crowding and ensures they get enough air and sun. Use trellises or cages for climbing plants like cucumbers and beans.
“Adopting vertical gardening techniques not only saves space but also enhances plant health and increases yield by facilitating better air circulation and sunlight exposure.”
In summary, using companion planting, succession planting, and vertical gardening boosts your harvest. These methods make your raised beds more productive and healthy. Your garden will flourish, giving you plenty of fresh produce all season.
Troubleshooting Common Issues
Raised garden beds are great for growing many plants. But, they can face problems like poor drainage, soil erosion, and pests. Let’s explore how to solve these issues.
Poor Drainage
Poor drainage can harm your plants. To fix it, make sure your raised bed has the right soil mix. A mix of sand, silt, and clay is best for drainage.
Adding compost improves drainage and makes the soil richer. If problems persist, add more drainage holes or raise the bed.
Soil Erosion
Soil erosion can lose nutrients and weaken your bed. Use landscape fabric at the bottom to keep the soil in place. Planting cover crops or mulching helps protect the soil from rain and wind.
Check your beds often for erosion signs. Refill them with a balanced mix to keep conditions right.
Pest Infestation
Controlling pests is key. Aphids, caterpillars, and gophers can harm your garden. Use barriers like hardware cloth to stop burrowing pests.
Row covers or insect netting can keep flying pests away. Healthy plants are less likely to attract pests. Use natural sprays or beneficial insects to fight infestations.
By tackling these garden bed problems and fixing raised bed issues, we can keep our beds productive. Remember, regular care and quick action are crucial. Let’s keep our raised garden beds healthy and pest-free with these tips.
| Issue | Solution |
|---|---|
| Poor Drainage | Balance soil mix, add organic matter, create drainage holes |
| Soil Erosion | Use landscape fabric, plant cover crops, apply mulch |
| Pest Infestation | Install barriers, use insect netting, organic fertilizers, regular inspection |
Conclusion
Starting garden bed projects is fun and rewarding. Raised garden beds have many benefits over traditional gardening. They improve soil and drainage, and are easier on your back and knees.
Building raised garden beds lets you control the soil quality. This means better nutrients and structure for your plants. Raised beds also prevent root rot, which is good for plant health and yield.
Using a garden planner can make planning easier by 40%. Raised beds warm up earlier in spring, extending the growing season. They also save up to 50% of water, making them eco-friendly. Follow these tips for a successful and sustainable garden.


