Refinishing your kitchen cabinets is a quick way to make your kitchen look new. It’s a simple way to update old or worn-out cabinets. You can refinish, reface, or repaint them to give your kitchen a fresh look. Knowing the right techniques and tools is key.
This guide will give you expert tips and step-by-step instructions for refinishing your kitchen cabinets. You’ll learn how to prepare the surfaces, pick the best primer, and apply a topcoat. It’s perfect for both experienced DIYers and first-timers. You’ll get the skills and confidence to achieve professional results.
Key Takeaways
- Proper preparation is key to a successful cabinet refinishing project.
- Selecting the right primer and topcoat can make a significant difference in the final finish.
- Attention to detail and following the right application techniques will ensure a smooth, even result.
- Careful planning and scheduling can help you complete the project efficiently.
- Having the necessary materials and tools on hand will streamline the process.
Importance of Preparation
Preparing your kitchen cabinets before refinishing is key. It doesn’t matter if you’re doing cabinet refacing, cabinet painting, or cabinet refinishing. Taking the time to get the surfaces ready can greatly improve the final look and make it last longer.
Protecting Surfaces and Removing Components
First, lay down floor protection and cover your countertops to avoid spills or drips. Then, take out all doors and drawers, label them, and keep track of where they go. This keeps your surfaces safe and makes cleaning and preparing the cabinets easier.
Cleaning and Degreasing Cabinets
Next, clean and degrease your cabinets well. Remove any food or grime, then wash and scrub with soap and water. For tough grease, use a trisodium phosphate (TSP) solution to get rid of it.
“Preparation is the key to a successful cabinet refinishing project. Take the time to properly protect your surfaces and thoroughly clean the cabinets – it will pay off in the long run.”
Putting in the effort to prepare your cabinets well sets you up for a smooth refinishing process. You’ll end up with a finish that looks great and lasts a long time.
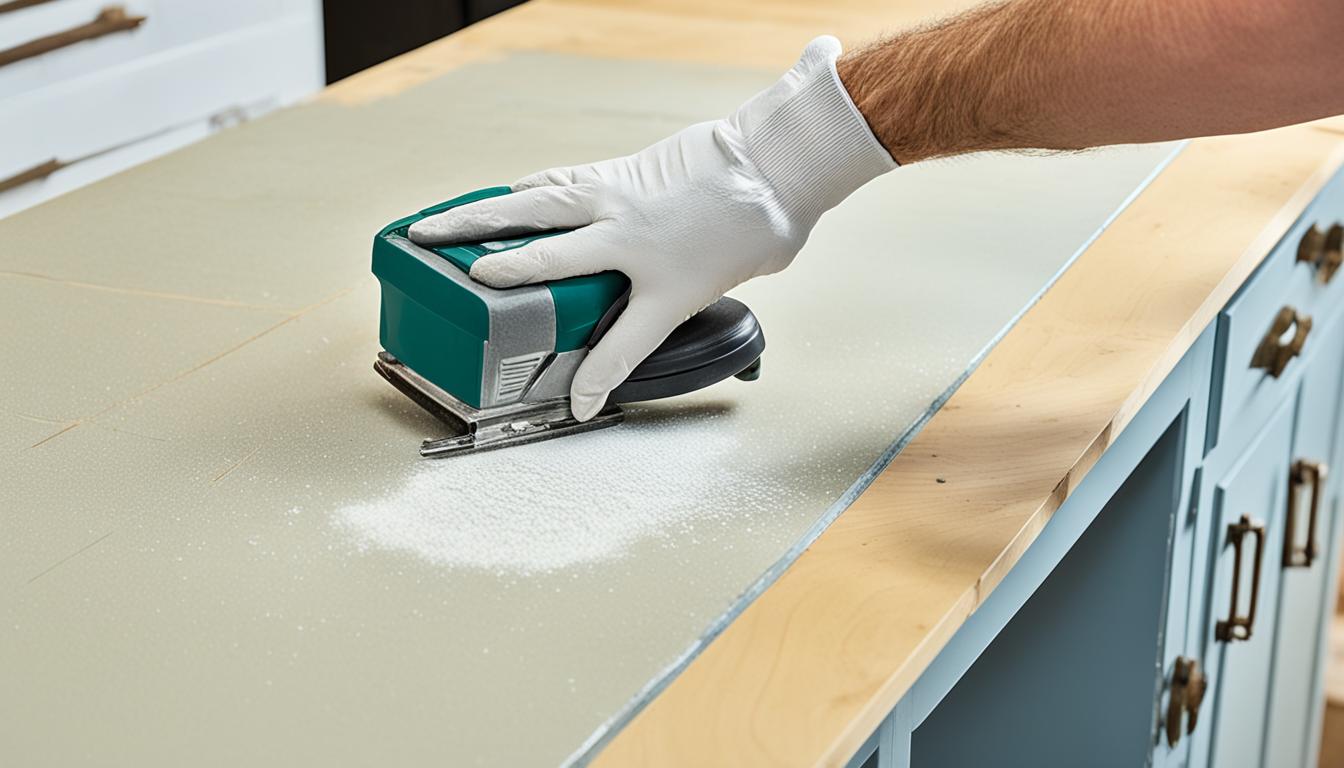
Sanding, Vacuuming, and Tack-Clothing
Getting your kitchen cabinets ready for a new look is key in refinishing. You need to sand, vacuum, and tack-cloth them properly.
Start with sanding. Use medium-grit sanding sponges or a 180-grit orbital sander on the cabinets. This smooths out the surface for primer and topcoat. Cabinet sanding is vital for a strong bond and a professional finish.
After sanding, clean up the dust. A shop vacuum with a brush attachment is best for this. It removes most of the cabinet dust. This ensures a clean surface for painting and priming.
Finish with a tack-cloth to get rid of any leftover dust. Tack-cloths grab fine particles without leaving marks. This step makes sure your cabinets are perfect for painting.

“Proper surface preparation is the foundation for a stunning cabinet refinishing project. Don’t skip these critical steps!”
Sanding, vacuuming, and tack-clothing your cabinets prepares them for refinishing. Paying attention here leads to a great final result.
Selecting the Right Primer
Choosing the right primer is key when refinishing kitchen cabinets. The wrong primer can cause uneven finishes, chipping paint, and stain bleeding. It’s vital to pick a high-quality, stain-blocking primer for a solid base.
Importance of a Stain-Blocking Primer
A stain-blocking primer, like KILZ 3® Premium Primer, seals in stains or discoloration. This ensures a clean, uniform look without bleed-through. It also improves the topcoat’s adhesion for a durable finish.
Recommended Primer: KILZ 3® Premium Primer
KILZ 3® Premium Primer is a top choice for cabinets. It’s low-odor, dries fast, and covers stains well. Its easy application and quick drying make it perfect for a smooth finish.
| Feature | KILZ 3® Premium Primer |
|---|---|
| Stain Blocking | Excellent |
| Odor | Low |
| Drying Time | Fast |
| Adhesion | Exceptional |
“KILZ 3® Premium Primer is the perfect choice for cabinet refinishing projects. Its stain-blocking properties and fast-drying formula make it a game-changer for achieving a flawless, long-lasting finish.”
Priming Techniques
Priming your kitchen cabinets is key for a smooth finish. It helps the topcoat stick better. When priming, think about a few important things for a pro look.
Choosing the Right Brushes and Rollers
For perfect cabinet priming, pick the right tools. A fine-bristle nylon brush is best for brush application. It leaves no marks. For roller application, choose a high-quality woven cover with a ¼” or ⅜” nap. This gives a smooth finish without fibers.
Application Methods: Brush, Roller, or Sprayer
- Brush application: Use a fine-bristle nylon brush for even coverage and a smooth finish.
- Roller application: Get a high-quality woven roller cover and a ¼” or ⅜” nap for smooth strokes.
- Sprayer application: For a pro look, try a cabinet painting tools like a high-quality HVLP sprayer. It gives a flawless finish easily.
Choose your application method wisely. Aim for even and thorough primer application. Be careful and take your time for the best look.

“The secret to a perfect cabinet priming job lies in the preparation and attention to detail.”
Caulking and Final Preparation
Getting the cabinet surfaces ready is key for a perfect finish. After the primer dries, I lightly sand the surfaces for better adhesion and to fix small flaws. Then, I vacuum and wipe the cabinets clean to get rid of dust before caulking.
Caulking is vital for sealing cracks or gaps that have opened over time. I use a top-notch cabinet caulking product for better adhesion on primed surfaces. But, don’t caulk the panels on cabinet doors. They need to move with the humidity and temperature changes.
| Cabinet Surface Preparation Checklist |
|---|
|
By preparing the cabinet surfaces well and caulking them, I get a smooth, lasting finish. This careful prep is what makes kitchen cabinets look professional.
Applying the Topcoat
Getting a perfect cabinet finish is key, and it starts with the topcoat. Just like with priming, the right techniques matter a lot. Let’s look at how to apply the topcoat for a smooth finish.
Recommended Application Techniques
Use the same quality brush or roller for the topcoat as you did for priming. This keeps the finish consistent on all surfaces. Paint the door backs first and lay them flat to ensure a smooth finish.
For the cabinet boxes, keep a wet edge as you paint. This reduces brush or roller marks. Adding a second coat gives extra protection and shine.
Achieving a Smooth, Even Finish
For a top-notch cabinet finish quality, pay close attention during the topcoat stage. Work in sections and check your strokes. Make sure there are no drips or uneven spots. With patience and the right cabinet painting techniques, your cabinets will look amazing.
“The key to a stunning cabinet finish is in the topcoat application. Take your time, work meticulously, and the results will speak for themselves.”
The cabinet topcoat application is the last step in refinishing. By following these tips, you’ll get a flawless, lasting finish. Your cabinets will impress everyone.
Reassembling and refinish kitchen cabinets
After refinishing the cabinet doors, drawers, and parts, it’s time to put everything back together. This step is key for a smooth, professional look in your kitchen cabinet update.
Installing Doors, Drawers, and Hardware
Start by taking off the tape and plastic from the cabinet boxes. Put the doors back on, making sure they move well and line up right. Add knobs, pulls, or other hardware, adjusting them for a neat look.
- Reinstall cabinet doors using only hand tools to avoid stripping delicate screws.
- Install knobs, pulls, and other hardware, adjusting as necessary for a uniform appearance.
- Check that all doors and drawers open and close smoothly.
Final Touch-Ups and Adjustments
Once the doors and hardware are on, review your work. Look for any small flaws or spots needing a cabinet touch-up. Add new clear rubber bumpers to the doors and drawers to stop damage and make closing quiet and soft.
- Inspect for and address any final cabinet reassembly issues.
- Install new rubber bumpers on doors and drawers.
- Ensure all cabinet hardware installation is secure and functioning properly.
By reassembling your kitchen cabinets with care and making any needed tweaks, you’ll get a perfect, lasting finish. This will change the look of your kitchen.
Planning and Scheduling
Planning and scheduling are key to a successful cabinet refinishing project. I learned this the hard way. A detailed timeline helps make the project smooth and efficient. Working with helpers ensures everyone knows what to do and when.
Creating a Timeline for the Project
Start by making a timeline for your cabinet refinishing. List tasks like surface prep, priming, painting, and putting the cabinets back together. This plan helps you see the whole process and manage your time better.
Coordinating with Helpers
If your project is big, you might need help. Work with family, friends, or pros to make sure everyone knows when to show up. Plan work sessions, assign tasks, and share updates to keep things running smoothly.
| Task | Estimated Time | Responsible Party |
|---|---|---|
| Preparation (Cleaning, Sanding, Masking) | 2-3 days | Me + Helper 1 |
| Priming | 1 day | Me |
| Painting (Doors, Drawers, Cabinet Boxes) | 2-3 days | Me + Helper 2 |
| Reassembly and Final Touches | 1-2 days | Me |
Planning and scheduling your cabinet refinishing project makes it go smoother. Remember, a detailed timeline and good coordination with helpers are key.
Materials and Tools Needed
Starting a cabinet refinishing project means you need the right supplies and tools. As someone who loves DIY projects, I’ve learned that having the right tools makes a big difference. Let’s look at the key supplies and tools you’ll need for a great finish.
Essential Cabinet Refinishing Supplies
- Primer: A good primer, like KILZ 3® Premium Primer, is key for a smooth surface and covering stains.
- Paint: Pick a paint that’s strong and made for cabinets and wood surfaces inside your home.
- Wood Filler: Use wood filler to fix any flaws or cracks on the cabinets.
- Sandpaper: Get different grits of sandpaper to get the surface ready for paint.
- Rags and Cleaning Supplies: You’ll need clean rags, cleaners, and degreasers to clean the cabinets well before you start.
Essential Cabinet Refinishing Tools
- Palm Sander: A palm sander is a must for smoothing out the cabinets and getting an even finish.
- Spray Gun: For a smooth finish, think about using a spray gun with an air compressor to apply the paint.
- Power Drill: A power drill with different bits is useful for taking apart and putting back together the cabinets.
- Breathing Masks: Wear breathing masks to protect your lungs during sanding and painting.
With the right cabinet refinishing supplies and cabinet refinishing tools, you’re ready to update your kitchen cabinets and give them a new look.
| Cabinet Refinishing Supplies | Cabinet Refinishing Tools |
|---|---|
| Primer | Palm Sander |
| Paint | Spray Gun |
| Wood Filler | Power Drill |
| Sandpaper | Breathing Masks |
| Rags and Cleaning Supplies |
Step-by-Step Process
Transforming your kitchen cabinets can be a rewarding DIY project. The key to a professional-looking finish is in the preparation. Let’s explore the step-by-step journey of cabinet refinishing.
Preparation: Sanding, Filling, and Masking
Begin by removing all the doors, drawers, and hardware from your cabinets. This lets you sand off the old finish and fix any imperfections. Use a palm sander or orbital sander to smooth the surfaces, following the wood grain direction.
After sanding, fill any holes or cracks with a quality wood filler. Let it dry completely, then sand it down to match the surface.
Next, mask off areas you don’t want painted, like hinges, countertops, and flooring. This ensures a clean, professional finish.
Priming and Wet Sanding
With prep work done, prime the cabinets. Use a stain-blocking primer, like KILZ 3® Premium Primer, for a smooth surface. Apply the primer with a brush, roller, or sprayer for even coverage.
Once dry, lightly wet-sand the surfaces for a glass-like finish.
Painting: Doors, Drawers, and Cabinet Boxes
The final step is applying the topcoat. Use high-quality paint and apply two coats, with drying time in between. Paint the doors, drawers, and cabinet boxes with a brush, roller, or sprayer.
Ensure an even, streak-free finish by taking your time.
By following these steps for cabinet sanding, cabinet priming, and cabinet painting, you’ll refresh your kitchen cabinets and revitalize your space.
Conclusion
Refinishing your kitchen cabinets can make a big change without the high cost of a full remodel. This guide offers expert advice to help you get a professional look for your kitchen. You’ll give your kitchen a new life.
This project is not just about looks. It’s also a smart way to save money compared to a full kitchen redo. With the right steps, your cabinets will look great for years to come.
If you want a new look for your kitchen, think about refinishing your cabinets. With some effort and care, you can make your kitchen look amazing. You’ll be proud to show off your kitchen to everyone.