As a homeowner, I’ve always been fascinated by the power of transformation in our living spaces. Recently, I decided to remove the old, worn-out carpet in my living room. The idea of revealing a fresh, clean subfloor was both exciting and a little daunting. But I was determined to take on the challenge and create a space that better suited my style and needs.
Removing old carpets can be a big job, but it’s doable as a DIY project. In this guide, I’ll show you how to safely and effectively remove carpets, padding, and tack strips. You’ll end up with a clean subfloor ready for your next flooring project.
Key Takeaways
- Proper preparation and clearing of the space is crucial for a successful carpet removal project.
- Utilizing the right tools, such as a pry bar and utility knife, can make the carpet detachment and cutting process more efficient.
- Safely disposing of and potentially recycling the old carpet is an important consideration for an eco-friendly home renovation.
- Addressing special areas like stairs and doorways requires additional attention to ensure a thorough and seamless carpet removal.
- Inspecting and cleaning the subfloor after carpet removal is necessary to prepare for new flooring installation.
Prepare and Clear the Space
Before starting the carpet removal, it’s key to prepare the area. Move all furniture out and remove any doors that open into the room. This ensures you can access the carpet edges without causing damage.
Remove Furniture and Doors
Begin by carefully moving furniture like sofas, chairs, and tables out of the room. This lets you work without damaging your items. Also, remove any doors that open into the space. It makes removing the carpet easier and ensures a smooth transition.
Gather Essential Tools and Safety Equipment
Get ready to remove the carpet by collecting the right tools and safety gear. You’ll need a utility knife, pliers, a floor scraper, and a pry bar. These tools help safely remove the carpet from the tack strips and subfloor. Remember to also get personal protective equipment like gloves, knee pads, and a dust mask for your safety.
| Preview | Product | Price | |
|---|---|---|---|

|
Milwaukee 48-22-1901 Fastback Press and Flip Utility Knife with Belt Clip and Onboard Wire Stripping | $23.53 | Buy on Amazon |
| Preview | Product | Price | |
|---|---|---|---|

|
7-piece WORKPRO Pliers Set with Groove Joint, Long Nose, Slip Joint, Linesman, and Diagonal Pliers... |
$23.96 |
Buy on Amazon |
| Preview | Product | Price | |
|---|---|---|---|

|
Floor Scraper, 31" to 61" Scraper Tool Long Handle with 4-inch Razor Blade Stainless Steel Material... | $29.99 | Buy on Amazon |
| Preview | Product | Price | |
|---|---|---|---|

|
Monkey King Bar-18IN Pry Bar Gooseneck Wrecking Bar-Crowbar Tool for Many Pulling | Buy on Amazon |
| Preview | Product | Price | |
|---|---|---|---|

|
COOLJOB 3 Pairs Nitrile Rubber Coated Nylon Safety Work Gloves for Men, Dotted for Non-Slip Grip... |
$14.81 |
Buy on Amazon |
| Preview | Product | Price | |
|---|---|---|---|

|
DEWALT Flooring Knee Pads with Comfort Gel, High Density Foam (DWST590014) | $29.99 | Buy on Amazon |
No products found.
By preparing the space and gathering the right tools and safety gear, you’re set for a successful DIY carpet removal project.
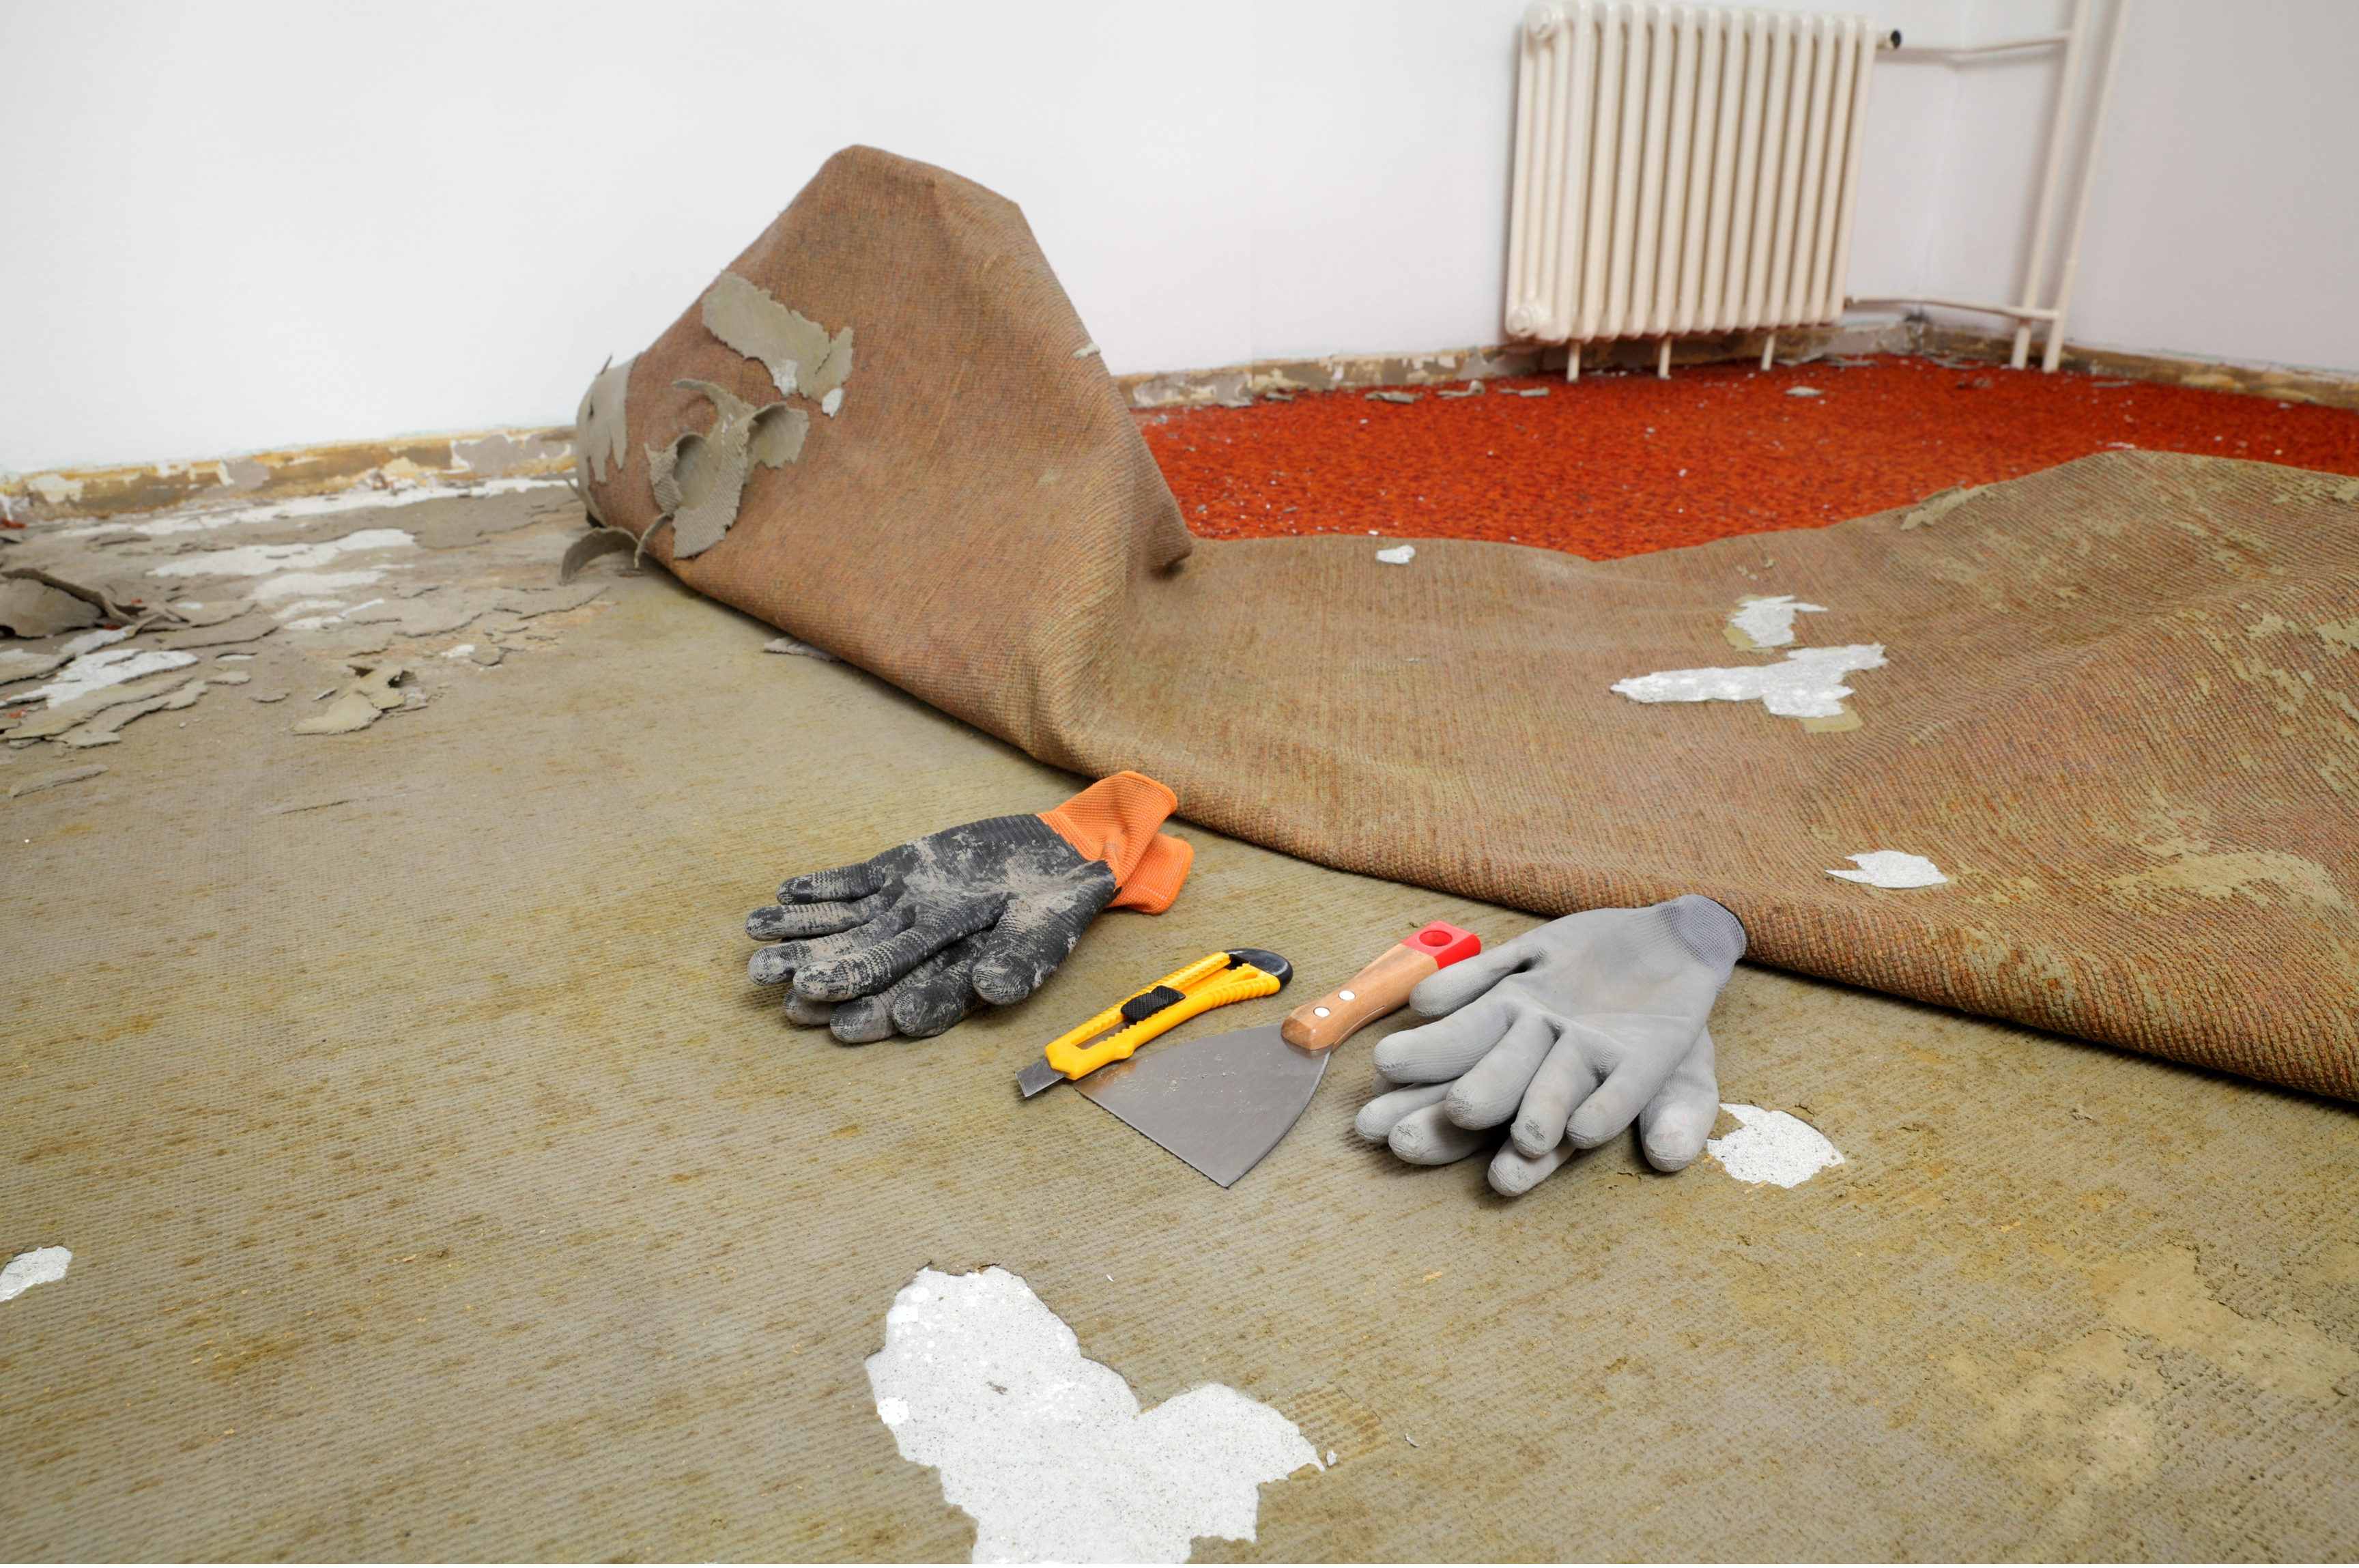
Detach Carpet From Tack Strips
The first step in removing your old carpet is to detach it from the tack strips around the room. These strips are small metal with sharp teeth that hold the carpet in place. Start by standing in a corner and use pliers to grip the carpet. Gently pull it up off the tack strip.
If the carpet doesn’t come up easily, you might need to cut a 6-inch square in the corner first. This will help you start pulling the carpet from the tack strip. Move around the room, carefully detaching the carpet from all tack strips along the walls.
This step of separating the carpet from the tack strips is key in the carpet removal journey. It needs patience and detail to avoid damage. With the right methods for removing carpet from tack strip, you’re on your way to a successful DIY project.
- Start in a corner and use pliers to grip the carpet
- Gently pull the carpet up and off the tack strip
- If needed, use a utility knife to cut a 6-inch square in the corner
- Work your way around the room, detaching the carpet from all tack strips

Removing the carpet from tack strips is a bit of work, but it’s crucial for your project’s success. By carefully detaching the carpet, you prepare for the next steps. This ensures a smooth transition to your new flooring.
Cut Carpet Into Manageable Strips
After you’ve removed the carpet from the tack strips, it’s time to cut it into sections. This makes the removal process easier and more efficient. It’s best to cut the carpet into strips that are 3-4 feet wide. This size is easy to handle and transport.
Recommended Strip Width
Try to cut the carpet into strips that are 3-4 feet wide. This width is big enough to cover a lot of area but small enough to fit through doorways. For smaller spaces, like closets, cut the carpet at the doorway. Then, remove the piece inside the closet separately.
Cutting Techniques
Always cut the carpet from the back side. This gives you a more stable surface to work with. Use a sharp utility knife to make clean cuts along the fold of the carpet. Apply firm, even pressure for a smooth cut.
If you hit a metal transition between flooring types, cut the carpet there. Leave that section in place. Breaking down the carpet into strips makes removal easier. Follow these tips for a smooth carpet removal process.
“Cutting the carpet into 3-4 foot wide strips is the most convenient size to handle and remove from the room.”
Roll and Remove Carpet Sections
After cutting the carpet into strips, it’s time to roll them up and remove them. This step needs some effort, but the right methods make it easier. You can then take out the carpet pieces from the room.
Start by rolling each strip tightly. Use duct tape to keep it rolled up. This makes it easier to handle. Keep rolling and securing until all the carpet is removed.
For big, heavy carpet sections, get help from a friend or family member. Together, you can lift and carry the rolled-up carpet out. This teamwork ensures the carpet is removed safely and successfully.
The secret to rolling up and removing carpet is to secure the rolled-up pieces and use extra hands for big, heavy areas. By using these methods for rolling up carpet sections and securing rolled carpet for removal, you can extract the carpet pieces from the room easily.
“Proper preparation and a methodical approach to rolling and removing the carpet can make a world of difference in the overall efficiency of the project.”

| Task | Time Estimate |
|---|---|
| Cutting and rolling carpet strips | 30-60 minutes per room |
| Removing rolled-up carpet sections | 15-30 minutes per room |
| Cleaning up staples and nails | 1-2 hours per room |
Remove Carpet Padding
After removing the carpet, it’s time to deal with the padding. The type of padding depends on the subfloor. For concrete, the padding is glued down. You’ll need a sharp-bladed floor scraper to remove it.
Wood subfloors, like particleboard or plywood, have padding stapled in place. You can pull up the staples by hand. Then, use a floor scraper to remove any leftover staples.
Removing Glued Padding
Removing glued-down padding requires care. The dried adhesive can be hard to get rid of. Start with a scraper or spackling knife to remove as much glue as you can.
If glue residue remains, try softening it with boiling water or a steam cleaner. For tough spots, a reciprocating saw with a scraper blade works well.
Removing Stapled Padding
Wood subfloors have padding stapled in place. Begin by pulling up the staples by hand. Be careful not to damage the subfloor.
After removing most staples, use a floor scraper to get rid of any remaining pieces.
The black stuff under carpeting might not just be old padding. It could also be water damage or mold. If you see mold, clean it right away. Get a professional to ensure your home is safe and healthy.
Removing the carpet padding brings you closer to a clean subfloor. Always wear safety gear like a mask and goggles. This protects you from dust, pet dander, and allergens.
Remove Tack Strips
Removing tack strips is a key step when you’re getting rid of old carpet. You might want to put in hardwood or tile instead. Tack strips are thin, wooden pieces with sharp nails or tacks around the room’s edges. They keep the carpet in place.
To take out tack strips, you’ll need some important tools:
- Pry bar
- Hammer
- Pliers
- Safety gloves
Begin by gently prying up the tack strips with a pry bar. Move slowly and carefully to avoid harming the subfloor or baseboards. If the strips are rusty or damaged, you might need a hammer or pliers to get them out. Be careful of the sharp nails as you pull the strips up.
After removing the tack strips, vacuum the area well. This will get rid of any leftover nails or debris. It helps avoid scratches or punctures later. If the subfloor has holes or damage, you’ll need to fix those before putting in the new flooring.
Remember, it’s important to take your time and be careful when removing tack strips. This protects your subfloor and makes the transition to your new flooring smoother. With the right tools and effort, you can remove those tack strips and get closer to a new, fresh floor.
Address Special Considerations
Removing carpets can be tricky in some parts of your home. You might face challenges like stairs, doorways, and transitions. It’s important to handle these areas with care and the right methods.
Removing Carpet From Stairs
Removing carpet from stairs needs a careful plan. Start at the top and move down, cutting the carpet into sections, one step at a time. Be careful with the tack strips on each step, as they can be sharp and hurt you.
Handling Carpet Removal Around Doorways and Transitions
Doorways and transitions to other floors add extra challenges. Cut the carpet at these points but leave the transition pieces in place. Trying to remove these pieces can be hard and might harm the nearby surfaces.
| Consideration | Technique |
|---|---|
| Removing Carpet from Stairs |
|
| Handling Carpet Removal Around Doorways and Transitions |
|
By tackling these special areas with the right techniques, you can remove carpets from your home. This includes tricky spots like stairs, doorways, and transitions.
Clean and Inspect Subfloor
After removing your old carpet, it’s time to check the subfloor. Look for damage and clean it well before installing new flooring. This step is key to a successful installation.
Inspecting for Damage
Start by examining the subfloor carefully. Search for water stains, mold, or soft spots in the wood. These could mean there’s damage underneath.
Plywood, lumber, and concrete are common subfloor materials. Each needs a different way to check and fix problems.
- Plywood subfloors can handle water-based cleaning well.
- Lumber subfloors might swell, shrink, or warp with water, so be careful.
- Concrete subfloors are easy to clean and can take a lot of scrubbing.
If you find damage, fix it before installing new flooring. This might mean repairing or replacing parts of the subfloor.
Cleaning Methods
After inspecting, clean the subfloor well. Sweep or vacuum to get rid of dust and carpet fibers. For concrete, use a damp mop to remove adhesive.
For plywood and lumber, a vinegar-water mix or heat might work on tough glue. Make sure the subfloor is dry before installing new flooring.
Applying a concrete sealer, like Rob’s Solvent Sealer, can also protect against water damage.
“Properly cleaning and inspecting the subfloor is a crucial step in ensuring a successful new flooring installation. Take the time to address any issues and create a clean, smooth surface for your new flooring to be installed upon.”
How to Remove Carpets: Disposal and Recycling
Removing old carpets is the last step. Many places have carpet recycling programs. Check with your local waste management or carpet stores to see if they recycle. This way, your carpet can be turned into new products like car parts or roofing.
If recycling isn’t available, you’ll need to throw it away. Cut the carpet and padding into smaller pieces. This makes it easier to fit in your trash cans. You might also get bulky waste pickup from your community.
Another option is to hire a waste removal company like 1-800-GOT-JUNK. They’ll take care of everything, from tearing out the carpet to disposing of it. Costs can vary from $3 to $5.50 per square meter. So, get quotes from different companies.
FAQ
What tools and safety equipment do I need for carpet removal?
How do I detach the carpet from the tack strips around the room?
What’s the recommended width for cutting the carpet into strips?
How do I remove the carpet padding?
How do I handle carpet removal on stairs?
How do I dispose of the old carpet?
This site contains product affiliate links. We may receive a commission if you make a purchase after clicking on one of these links.