Are you ready to transform your living space with the beauty and durability of laminate flooring? Installing laminate flooring can seem like a daunting task, but with the right tools and a clear understanding of the process, it can be a rewarding DIY project you can tackle on your own. In this step-by-step guide, we’ll break down everything you need to know, from the essential tools required to the finishing touches that will make your new floor shine. Whether you’re looking to enhance the aesthetic appeal of your home or simply looking for a low-maintenance flooring option, our guide will provide you with the confidence and knowledge to tackle this project with ease. Let’s dive in and get started on your laminate flooring journey!
Essential Tools and Materials for Laminate Flooring Installation
When embarking on a home improvement project like laying laminate flooring, having the right tools and materials on hand is essential for a successful installation. The process can be straightforward, but without preparation, you may encounter unnecessary challenges that could complicate your efforts. To ensure a smooth installation, you need to familiarize yourself with the essential items needed.
- Quality laminate flooring is crucial. Choose a style and thickness that suits your needs and aesthetic preferences. Shop around to find the best deal
- Underlayment. This material serves multiple purposes, such as providing cushioning, reducing noise, and acting as a moisture barrier
- Tape measure to accurately gauge your space
- Utility knife, laminate cutter or a miter saw to cut the planks, depending on the thickness
- T-square to ensure that your cuts are precisely straight
In addition to these materials, several tools will facilitate the installation process.
- A tapping block and pull bar are vital for securing the planks together without damaging the edges
- Don’t forget tools like spacers to maintain appropriate expansion gaps around the edges of the room
- Safety goggles to protect your eyes during cutting tasks
- Level and a rubber mallet can help confirm that your flooring is even and well-fitted
Each of these tools contributes to answering the question of how to install laminate flooring effectively. Preparing ahead with the right materials and equipment not only simplifies the installation process but also enhances the final outcome of your flooring project, ensuring a beautiful and durable surface that can withstand the test of time.
Pre-Installation Preparations: Getting Your Space Ready
Before diving into the process of how to install laminate flooring, it’s essential to prepare your space to ensure a smooth and successful installation. The first step is to clear the area where you plan to lay the flooring. Remove all furniture, rugs, and any other items that could obstruct your work. This not only gives you a clear workspace but also protects your belongings from potential damage during the installation process. Take a moment to inspect the subfloor for any issues, such as cracks or unevenness, as addressing these problems beforehand can save you time and hassle later on.
Next, acclimating your laminate planks to the room’s temperature and humidity is a crucial part of the preparation process. Laminate flooring is typically made from compressed wood and resin, which can expand or contract based on environmental conditions. To prevent potential warping after installation, lay the sealed boxes of laminate in the room where they will be installed for at least 48 to 72 hours. This step allows the planks to adjust to the room’s moisture levels and temperature, ensuring they fit perfectly once installed.
It’s also essential to measure the space accurately before proceeding with the installation. Use a measuring tape to determine the length and width of the room, calculating the square footage to estimate how much laminate you will need. Always order a little extra to account for mistakes or future repairs. Additionally, it’s wise to choose the right underlayment and moisture barrier, particularly in areas susceptible to dampness, as this will help improve sound insulation and protect your flooring from potential damage.
Finally, gather all necessary tools before you begin, as this will streamline the installation process. You will need a saw for cutting the planks, a tapping block for fitting the pieces together seamlessly, and spacers to maintain the necessary expansion gaps against walls and other obstacles. With everything in place, you’re not only equipped to tackle the installation effectively but also to enjoy the transformation your new laminate flooring will bring to your space. Taking the time for these pre-installation preparations will make the task of how to install laminate flooring much more manageable and enjoyable.
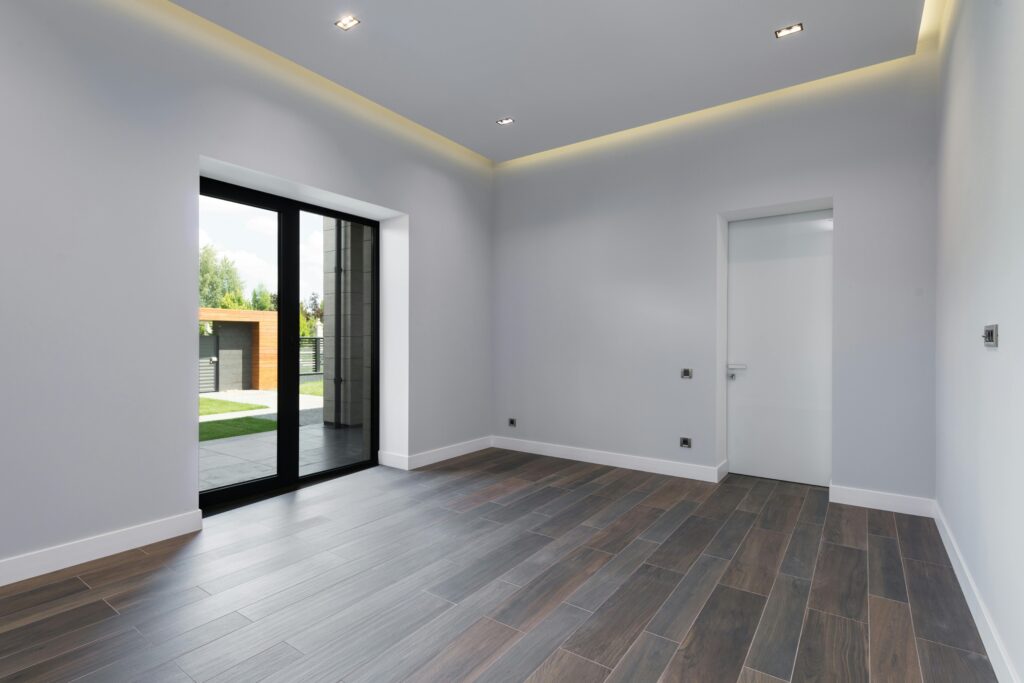
Understanding Laminate Flooring: Types and Styles
Laminate flooring has become an increasingly popular choice for homeowners looking to enhance the aesthetics of their spaces while maintaining durability and affordability. This versatile flooring option is engineered to mimic the appearance of natural materials, such as wood and stone, yet boasts a higher level of resistance to scratches and stains. Understanding the various types and styles of laminate flooring can greatly assist in selecting the right option for your home.
Among the different types of laminate flooring, there are three primary categories: Direct Pressure Laminate (DPL), High-Pressure Laminate (HPL), and Engineered Laminate. DPL is typically more affordable and suited for areas with moderate foot traffic, while HPL offers a thicker, more durable layer that can withstand heavier use, making it ideal for high-traffic zones. Engineered laminate combines the best of both worlds, marrying the aesthetic appeal of real wood with the resilience of laminate technology, making it suitable for various applications.
Styles of laminate flooring further expand the available options for consumers. From traditional oak and maple finishes to contemporary gray and distressed designs, the variety is extensive, allowing homeowners to customize their spaces to their personal taste. Additionally, many manufacturers offer laminate planks in different widths, lengths, and textures, simulating the look of genuine hardwood or stone with remarkable realism. This diversity enables individuals to create a cohesive look throughout their homes, whether it’s a cozy cabin vibe or a sleek modern aesthetic.
When it comes to installation, one of the most appealing aspects of laminate flooring is the ease with which it can be laid down. Many products feature a click-lock design that allows for straightforward installation without the need for glue or nails. Learning how to install laminate flooring can empower homeowners to take on the project themselves, saving on labor costs while achieving a professional finish. With the right preparation and understanding of the various types and styles available, transforming your living space with laminate flooring can be a fulfilling and stylish endeavor.
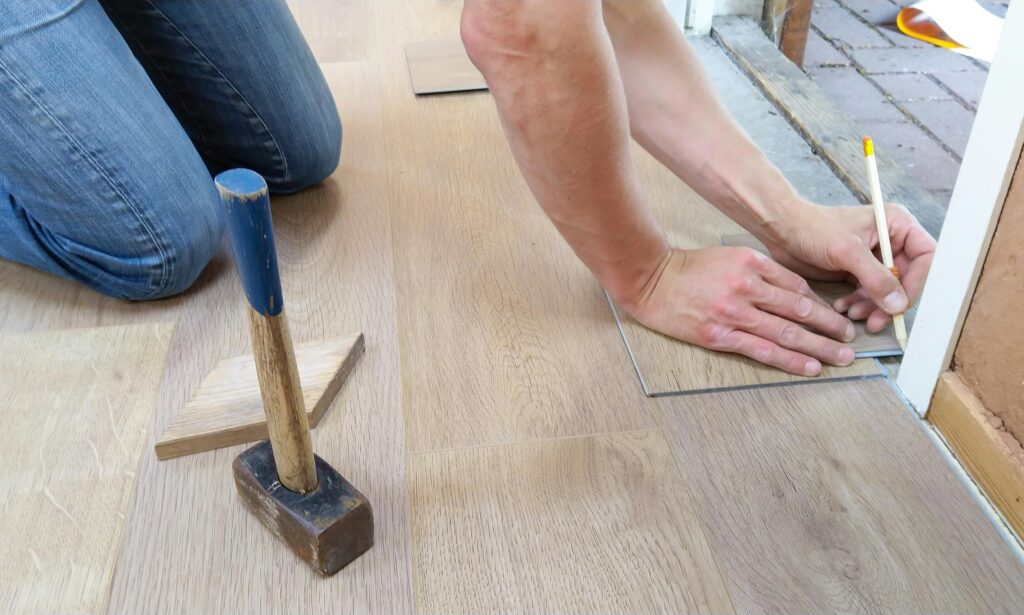
Step 1: Measuring and Calculating Floor Space
When considering a home renovation, one of the most crucial first steps is measuring and calculating the floor space accurately. Proper measurements not only ensure that you order the right amount of materials, but also help prevent costly mistakes during installation. Start by clearing the area of any furniture or obstructions, making it easier to measure. Use a tape measure to record the length and width of each room or space where you plan to install laminate flooring. For irregularly shaped areas, break them down into smaller rectangles or squares, measuring each section and adding the total square footage at the end.
After gathering your measurements, it’s time to calculate the total floor space. Multiply the length by the width for each section to achieve the square footage and then sum these areas together. It’s essential to account for any closets or alcoves, as these spaces also require flooring. Additionally, when estimating the amount of laminate flooring required, it’s wise to add about 10% extra to your total calculation. This extra allowance accounts for potential mistakes during cutting, waste from the installation process, or future repairs.
Once you have your calculations in hand, you’re ready for the next steps in your flooring project. Understanding how to install laminate flooring can be made simpler through good preparation and precise measurements. With the correct square footage determined, you can research your options, select the right type of laminate, and ensure you have all the necessary tools. Even if you choose to hire professionals for installation, knowing the exact area will help you communicate your needs and help ascertain accurate quotes from contractors.
In summary, measuring and calculating your floor space is a fundamental step in any flooring project, particularly when learning how to install laminate flooring. By being thorough in this stage, you’ll not only prepare yourself for a successful installation but also enhance the overall outcome of your home improvement endeavor.
Step 2: Preparing the Subfloor for Laminate Installation
Preparing the subfloor is a crucial step in the laminate flooring installation process. Before diving into how to install laminate flooring, it’s essential to ensure that your subfloor is in the best possible condition. A well-prepared subfloor not only enhances the lifespan of the laminate but also contributes to a more flawless finish that can withstand daily wear and tear. Start by inspecting the subfloor for any imperfections. It’s important to check for any loose or squeaky floorboards, as these may cause unwanted movement in your new flooring. If you encounter any defects, take the time to repair them before proceeding.
Next, the cleanliness of the subfloor cannot be overstated. Make sure to remove any debris, dust, or old flooring remnants that may interfere with the installation. A clean surface allows for better adhesion of underlayment, which can help with sound absorption and provide a moisture barrier. Depending on your existing subfloor material—wood, concrete, or old vinyl—different cleaning methods may be needed. Once the area is spotless, the next step is to assess its levelness. A level subfloor is vital; any dips or peaks can result in uneven laminate flooring that might buckle or warp over time.
If you discover that the subfloor is uneven, it’s advisable to use a self-leveling compound or cornice level to create a smooth surface. For concrete subfloors, moisture testing is also recommended, as excessive moisture can lead to problems later on. Once everything is level and dry, you can lay down the underlayment, which provides cushioning and noise reduction. It’s the final preparation step before you start laying down your laminate planks.
In conclusion, taking the time to properly prepare your subfloor will greatly influence the success of your new laminate installation. By thoroughly inspecting, cleaning, leveling, and installing underlayment, you set the stage for a professional and durable finish. Understanding how to install laminate flooring effectively includes recognizing the importance of these preliminary steps, ensuring that your investment in new flooring is both beautiful and long-lasting.
Step 3: Installing Underlayment for a Smooth Surface
Installing underlayment is a crucial step in achieving a smooth and durable surface for your laminate flooring. The right underlayment not only enhances the comfort of your floor but also helps to reduce noise and provides a moisture barrier. Before you start laying down the laminate, make sure to select an appropriate underlayment that matches your specific flooring requirements. Generally, underlayment is available in various materials, such as foam, cork, or rubber, and each type offers different benefits that can cater to your needs.
To begin the installation, first, ensure that your subfloor is clean, dry, and level. Removing any debris, small nails, or furniture will help create an optimal surface. Once your subfloor is prepared, roll out the underlayment across the entire area where the laminate will be installed. Ensure that the edges of the underlayment meet closely, with minimal overlaps, to avoid any unevenness in your flooring. If you are using a moisture barrier underlayment, make sure that the plastic film is facing down towards the subfloor to effectively protect against humidity.
As you lay the underlayment, you may need to cut it to fit around corners and obstacles, such as columns or doorways. Use a utility knife for clean cuts and consider employing masking tape to secure seams between the rolls. This added step will ensure that your underlayment remains in place during the entire laminate installation. Double-check the area for any gaps or bumps after installation, as a smooth underlayment is critical for a seamless finish when installing laminate flooring.
Once your underlayment is laid correctly, you can proceed with the installation of your laminate flooring. By following these steps and making the necessary preparations, you’ll set the stage for a successful laminate installation that not only looks great but feels great underfoot as well. Keep in mind that a well-installed underlayment is key to prolonging the life of your flooring and maintaining its aesthetic appeal over time.
Step 4: Laying Out Your Laminate Flooring Planks
Laying out your laminate flooring planks is a crucial step in the installation process that can significantly influence the final appearance of your space. To begin, gather all your materials and ensure the subfloor is clean, dry, and level. Familiarize yourself with the laminate planks, ideally allowing them to acclimate in the room for at least 48 hours. This helps the planks adjust to the room’s temperature and humidity, reducing the likelihood of expansion or contraction once installed.
When determining how to install laminate flooring, it’s essential to plan the layout before you start. Measure the room carefully and calculate the required number of planks. To create a balanced look, it’s often best to start laying the planks from the center of the room or a straight edge, working your way out to the walls. This approach not only helps achieve symmetry but also minimizes the appearance of uneven or shorter cuts at the room’s edges, which can be aesthetically unpleasing.
As you begin placing the planks, consider the direction in which the flooring will be laid. Typically, planks are installed parallel to the longest wall or the source of natural light in the room, as this can enhance the illusion of space. Lay the first row, ensuring each plank clicks securely into place according to the manufacturer’s instructions. Remember to leave a gap between the planks and the wall to allow for natural expansion, which is often achieved through the use of spacers.
Throughout the installation, keep checking for alignment and adjust as necessary. The goal is to create a seamless look that flows throughout the space. Once you have completed the layout of the planks, the satisfaction of seeing your well-planned floor will be well worth the effort. This meticulous attention to the layout is essential for both function and style, ensuring that the final result enhances your home’s aesthetic appeal while offering durability and practicality.
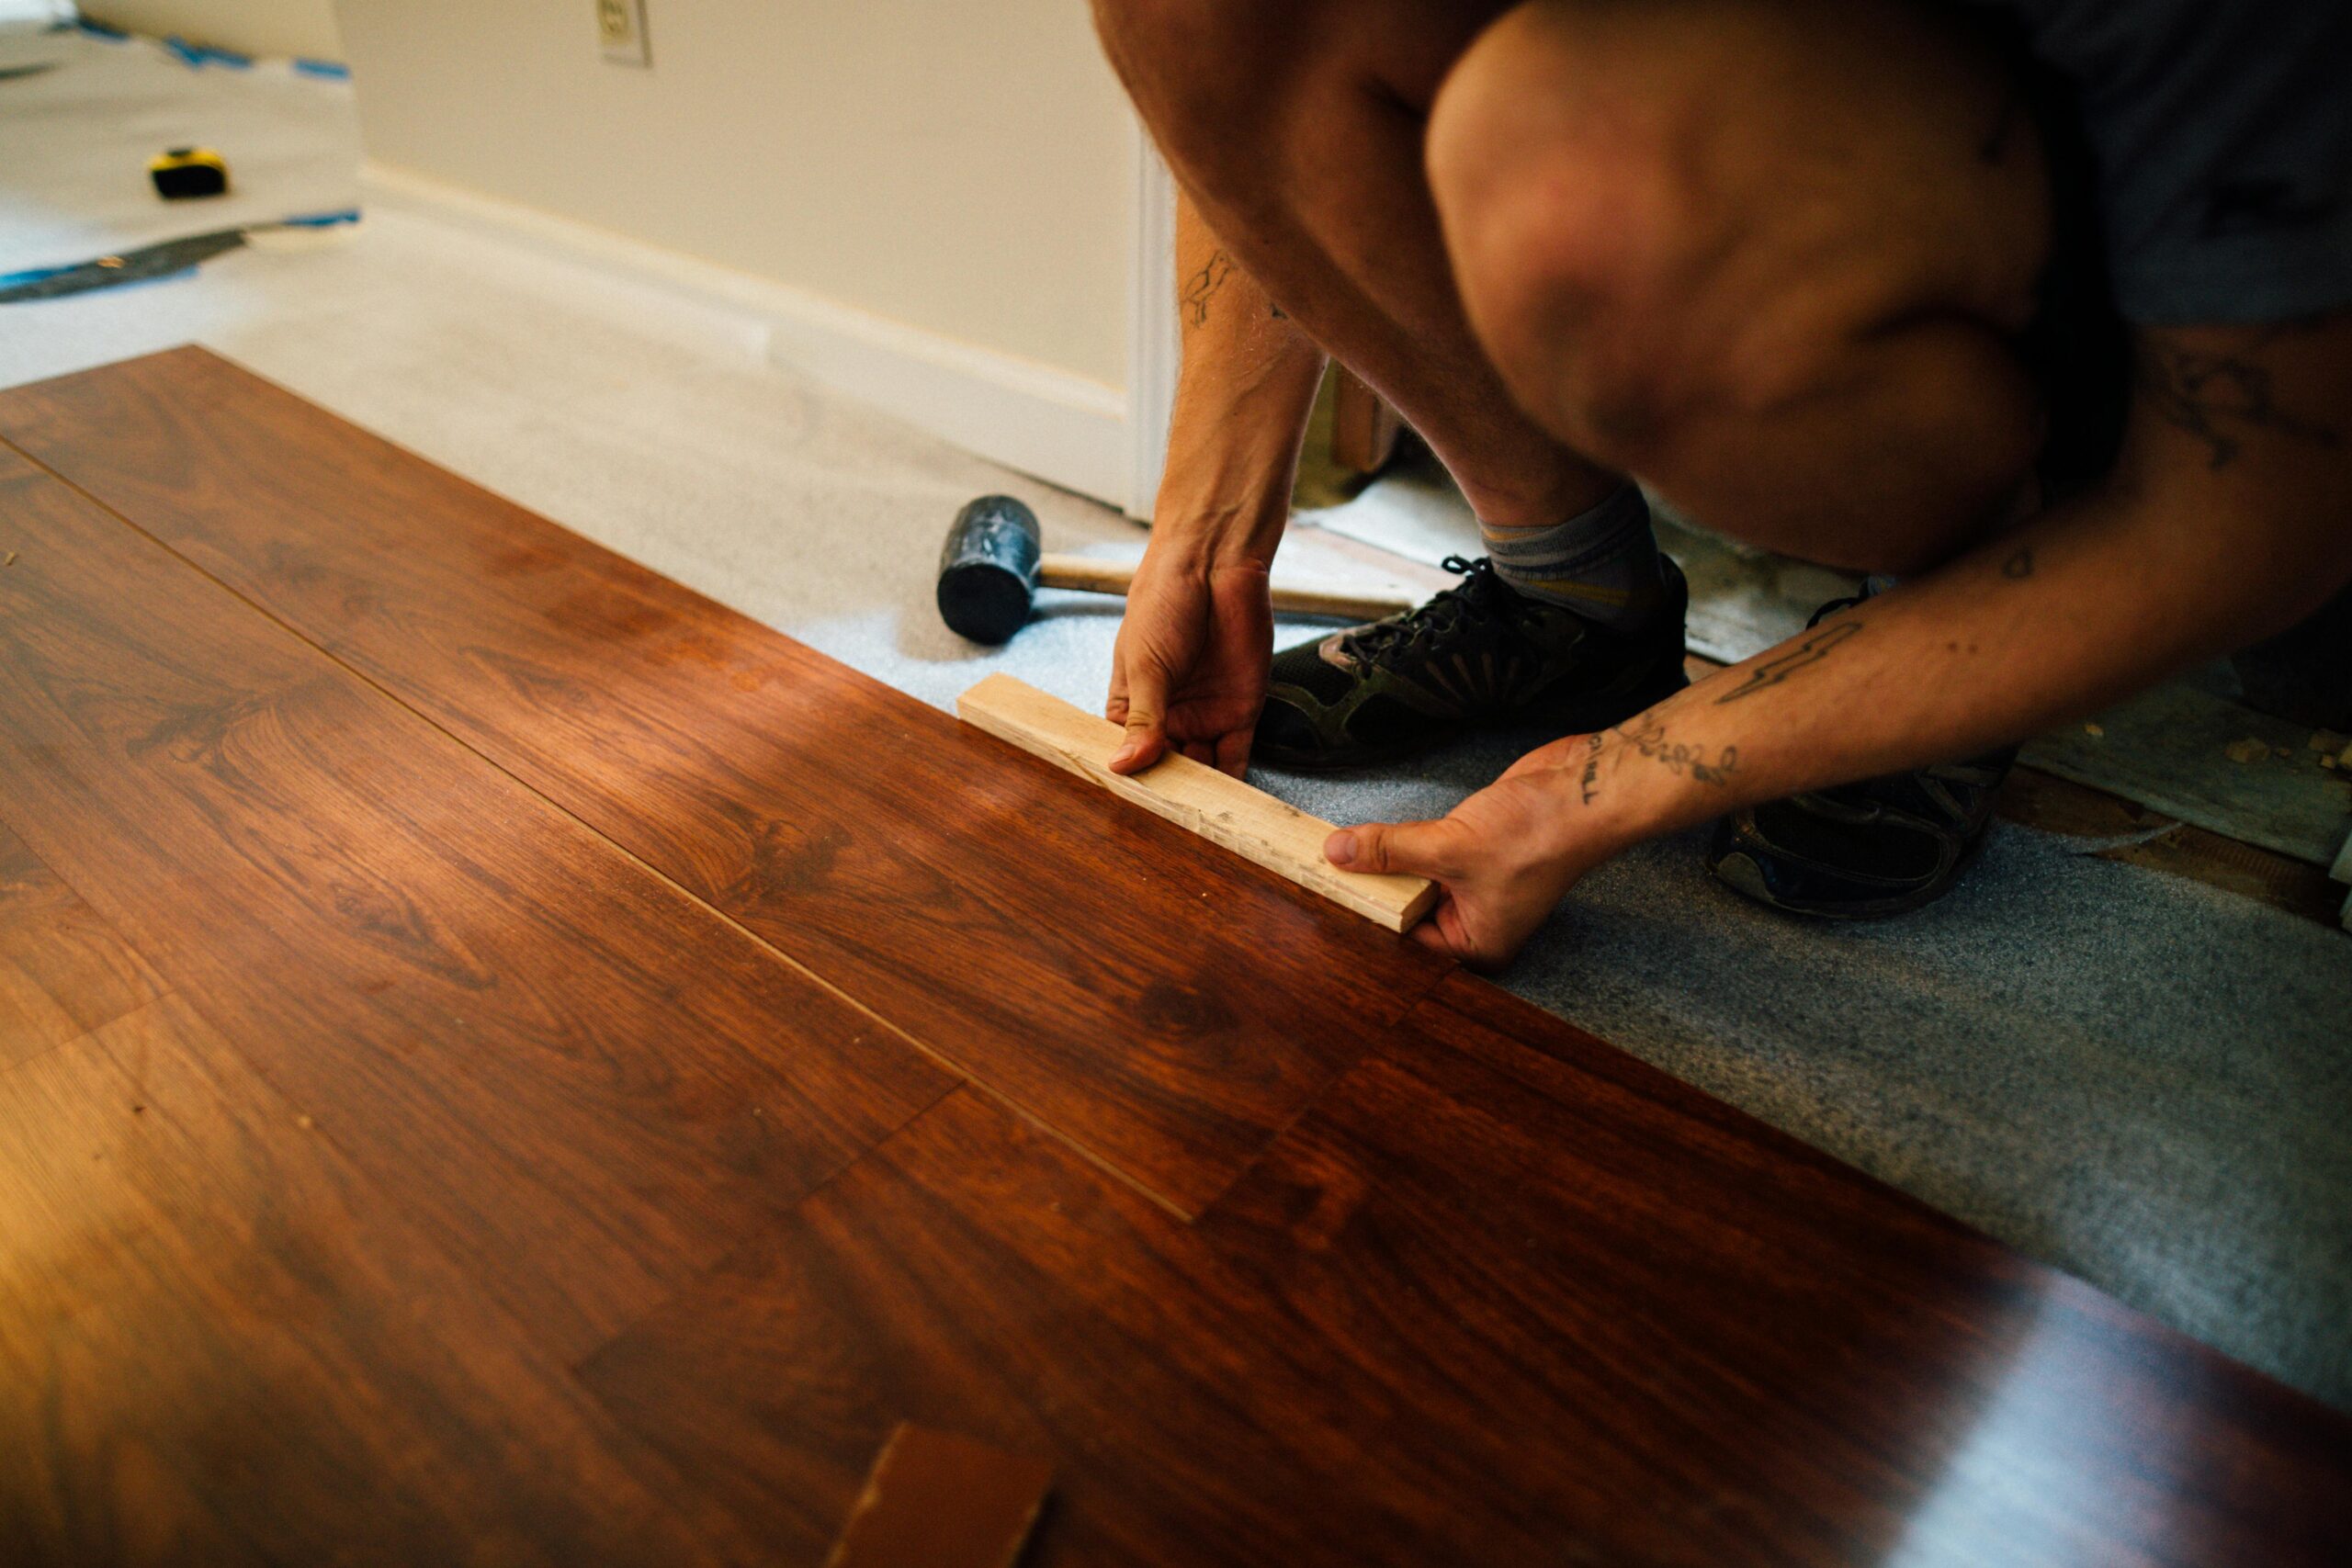
Step 5: Clicking and Locking the Laminate Boards Together
When it comes to installing laminate flooring, one of the most crucial steps is learning how to click and lock the laminate boards together. This process is not only essential for ensuring the flooring is secure and stable but also vital for achieving a seamless appearance once the installation is complete. The click-lock design of most laminate boards allows for a straightforward assembly method that can save both time and effort.
To begin, ensure that your subfloor is clean and dry, as any debris can interfere with the locking mechanism. Starting from one corner of the room, take your first plank and angle it into the adjacent board. This initial alignment is key; properly positioning the boards will prevent any gaps in the joints. Once the first board is secured, you can continue adding planks in a similar fashion, making sure to press firmly down on each piece until you hear an audible click. This sound confirms that the boards are locked together, providing the durability needed for long-term wear.
As you work your way across the room, keep an eye on the seams to ensure they align correctly. If you encounter any difficulty in locking the boards together, try adjusting the angle slightly to find the sweet spot. A rubber mallet can come in handy here as well, allowing you to gently tap the boards into place without damaging the laminate surface. Remember to stagger your seams as you go along, which not only enhances the aesthetic appeal but also reduces the risk of weakness in your flooring structure. If your planks are all the same length, to stagger the seams simply cut the first plank of every second row. You can alternate between one-third and two-third lengths to further stagger the seams. Just make sure you cut the end away from the second plank.
When your reach a wall or doorway, you will have to cut the planks to fit. Just make sure you leave room for expansion.
Once you’ve successfully locked all the laminate boards together, take a step back and admire your handiwork. A well-installed laminate floor can transform the look of a room, giving it warmth and character. Don’t forget to follow up with the necessary finishing touches, such as installing baseboards and transitions, to seamlessly integrate your new flooring with the rest of your home. With practice and attention to detail, clicking and locking laminate boards can be a satisfying experience that enhances your space for years to come.
Step 6: Finishing Touches and Trim Work
As you approach the final stages of your laminate flooring project, the finishing touches and trim work are essential to achieving a polished and professional look. One of the first steps in this phase is to install the baseboards and quarter-round moldings. These pieces not only cover the expansion gaps required around the edges of the flooring but also serve to enhance the overall aesthetic of your space. Before installation, ensure that all laminate planks are securely in place and that any necessary adjustments have been made for a seamless transition from room to room.
When installing the trim, it’s important to measure carefully and cut at the correct angles to achieve tight seams. Use a miter saw for precision, and don’t forget to pre-drill holes for the finishing nails to avoid splitting the wood. If you’ve opted for a color or style of trim that complements your laminate flooring, this detail can dramatically uplift the ambiance of the room. Additionally, consider caulking any visible gaps between the trim and the wall for a clean finish, ensuring that your work not only looks good but also holds up over time.
After the trim is securely in place, the final step in polishing your laminate flooring installation is to clean the surface thoroughly. This includes vacuuming up any dust or debris generated during the installation process and gently mopping the floor with a cleaner specifically designed for laminate surfaces. Avoid using harsh chemicals or excess water, as these can damage the flooring’s finish. Taking the time to ensure everything is spotless will leave your newly installed laminate flooring looking brand new, ready for you to show off to family and friends.
Finally, don’t forget to move back any furniture and decor that was temporarily removed during the installation process. As you set everything back in place, consider arranging your furniture in a way that highlights the beauty of your new flooring. By following these finishing touches and trim work tips, you’ll not only know how to install laminate flooring effectively but also create a welcoming environment that reflects your personal style and attention to detail.
Maintenance Tips for Long-Lasting Laminate Floors
Laminate flooring has become a popular choice for homeowners due to its affordability, durability, and ease of maintenance. To ensure that your laminate floors remain in top condition for years to come, it’s essential to adopt a few simple care practices. Regular cleaning is critical; sweeping or vacuuming (with a soft brush attachment) can help eliminate dirt and debris that may scratch the surface. For deeper cleans, use a damp mop with a cleaning solution specifically formulated for laminate flooring. Avoid soaking the flooring, as excessive moisture can lead to warping and damage over time.
When it comes to protecting your laminate floors, placing mats at entryways can significantly reduce the amount of dirt tracked in from outside. Additionally, consider using felt pads underneath furniture legs to prevent scratches and dents. If you have pets, keeping their nails trimmed can also help maintain the integrity of the laminate. Be mindful of high-heeled shoes, as they can create indentations and wear the floor’s surface. By taking these preventive measures, you can prolong the life of your laminate flooring and keep it looking fresh.
In the event you decide to refresh your flooring, understanding how to install laminate flooring properly can provide a rewarding DIY experience. Ensure the subfloor is clean, dry, and level before laying down the laminate planks. It’s advisable to acclimate the planks to the room’s temperature and humidity for at least 48 hours before installation. This helps to prevent expansion or contraction after the floor is laid. Using a spacing gap around the edges will also accommodate any movement as the flooring expands or contracts over time.
Finally, be cautious about exposing your laminate floors to excessive sunlight, as prolonged exposure can cause fading and discoloration. Employing blinds or curtains can help manage the amount of UV light that enters a room. With these maintenance tips, you can enjoy your laminate flooring’s beauty and durability for many years, ensuring it remains a stylish and functional element of your home.